Key Takeaways
-
Identify specific cabinet damage types like moisture issues, loose hinges, and structural problems before starting repairs.
-
Gather essential tools like screwdrivers, wood filler, sandpaper, and a cordless drill to tackle most cabinet repair projects effectively.
-
For surface repairs, clean the damaged area, apply matching wood filler, sand carefully, and use stain markers for precise color blending.
-
Address structural issues like loose hinges by filling stripped screw holes with wood glue and dowels to restore strength and alignment.
-
Prevent future water damage by installing waterproof mats, applying sealant, and maintaining proper home humidity levels to protect cabinet integrity.
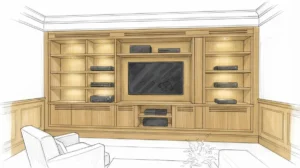
Cabinet repair is an essential skill for homeowners who want to maintain the beauty and functionality of their kitchen and bathroom spaces without the expense of full replacements. Whether you’re dealing with loose hinges, scratched surfaces, or water-damaged wood, understanding the fundamentals of cabinet restoration can save you thousands of dollars while preserving the character of your home. Many cabinet issues are surprisingly straightforward to address with the right tools, techniques, and a bit of patience. From structural problems to cosmetic concerns, learning how to assess damage and implement appropriate repairs empowers you to extend the lifespan of your cabinetry significantly. This comprehensive guide walks you through common cabinet problems, repair techniques, and when professional intervention becomes necessary for optimal results in your home improvement journey.
Understanding Common Cabinet Damage Types
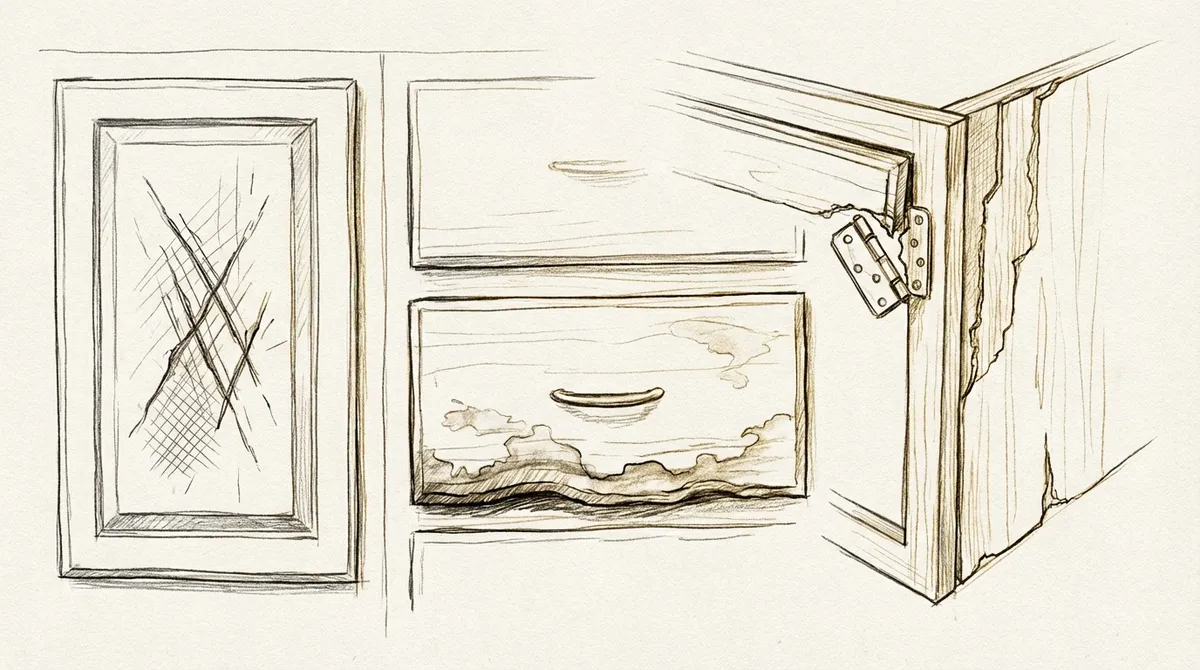
Before attempting any repair work, it’s crucial to identify the specific type of damage affecting your cabinets. Wood cabinets typically suffer from moisture damage, which manifests as swelling, warping, or discoloration around sink areas. This occurs when water repeatedly contacts unprotected wood surfaces, eventually breaking down the protective finish and penetrating the material itself. Laminate cabinets face different challenges, including peeling edges where the laminate separates from the substrate, bubbling from trapped moisture, or chipping along corners and edges from impact damage.
Structural issues represent another category of cabinet problems that require attention. Loose or broken hinges create sagging doors that don’t close properly, while stripped screw holes prevent hardware from securing firmly to the cabinet box. Drawer slides wear out over time, causing drawers to stick, derail, or collapse under normal weight loads. Understanding these distinctions helps you purchase the correct materials and approach each repair with appropriate techniques that address the root cause rather than just masking symptoms.
Assessing Damage Severity
Not all cabinet damage requires immediate professional intervention. Minor scratches, small dents, and superficial finish wear typically fall within the DIY repair category. These cosmetic issues don’t compromise structural integrity and can be addressed with refinishing techniques, touch-up markers, or wood filler applications. Medium-level damage includes loose hardware, minor water staining, and small cracks that haven’t spread significantly. These problems benefit from prompt attention to prevent escalation into more serious structural concerns.
Severe damage demands careful consideration and often professional expertise. Extensive water damage that has caused wood rot, major structural failures where cabinet boxes pull away from walls, and widespread veneer delamination usually require comprehensive cabinet solutions that may include partial or complete replacement. When assessing your cabinets, check for soft spots that indicate wood deterioration, measure gaps between doors and frames, and test all moving parts for smooth operation.
Essential Tools and Materials for Cabinet Repair
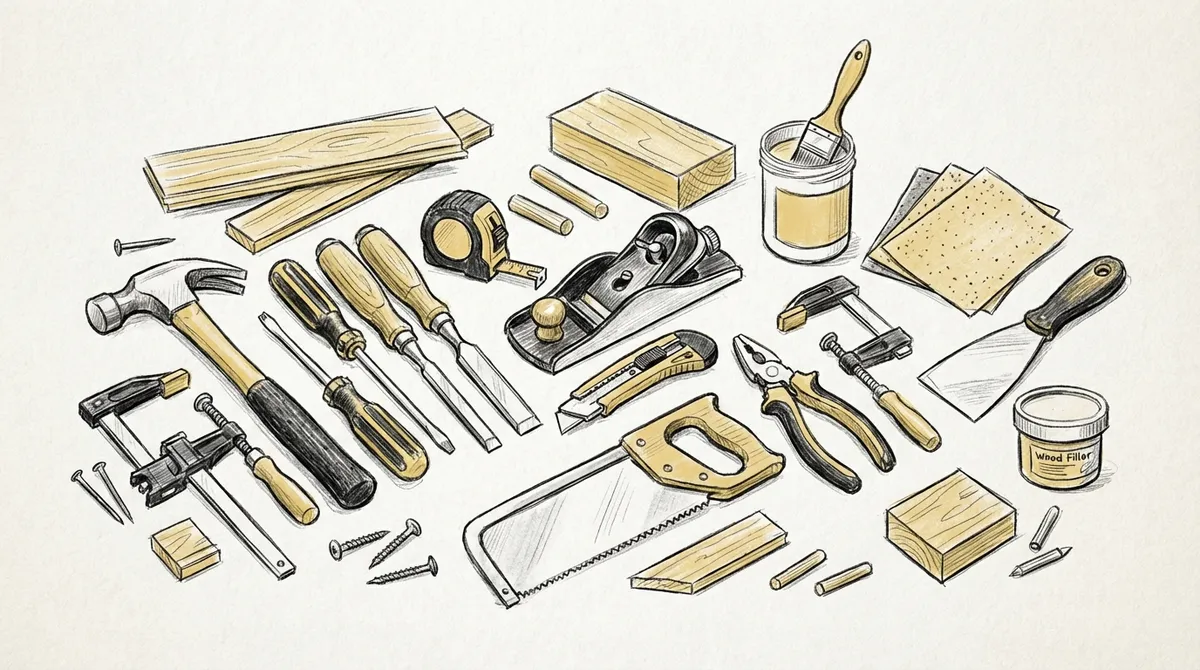
Successful cabinet repair depends on having the right tools readily available before starting your project. Basic hand tools form the foundation of any repair kit: screwdrivers in various sizes and types, hammer, putty knife, sandpaper in multiple grits, and measuring tape. Power tools expand your capabilities significantly, with a cordless drill being perhaps the most versatile investment for cabinet work. A random orbital sander speeds up refinishing projects considerably, while a jigsaw allows you to make precise cuts when replacing damaged sections.
Material selection matters just as much as tool quality. Wood filler comes in multiple formulations, with two-part epoxy fillers offering superior strength for structural repairs while lightweight spackling compounds work well for minor cosmetic fixes. Wood glue serves as the backbone of many repairs, with polyurethane-based formulas providing excellent moisture resistance for kitchen applications. Finish materials include stain markers for quick touch-ups, polyurethane or lacquer for protective coatings, and specialized cabinet paint if you’re changing colors during the repair process.
| Repair Type | Required Materials | Estimated Cost | Difficulty Level |
|---|---|---|---|
| Surface Scratches | Touch-up markers, fine sandpaper, finish | Low | Easy |
| Loose Hinges | Screwdriver, wood glue, toothpicks or dowels | Very Low | Easy |
| Water Damage | Wood filler, sandpaper, primer, paint/stain | Moderate | Intermediate |
| Broken Drawer Slides | Replacement slides, drill, screws | Moderate | Intermediate |
| Veneer Repair | Contact cement, veneer, roller, trimmer | Moderate | Advanced |
Step-by-Step Surface Repair Techniques
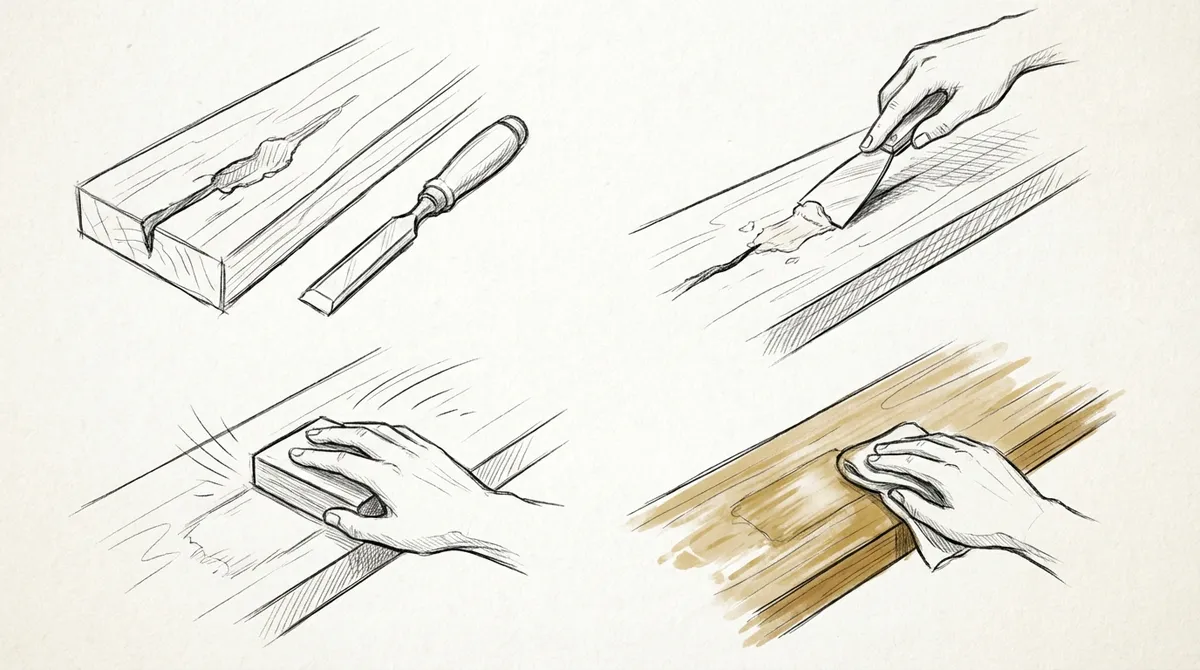
Surface repairs address cosmetic damage without requiring extensive disassembly or reconstruction. For minor scratches and gouges, start by cleaning the affected area thoroughly with a degreasing cleaner to remove cooking oils and residue that interfere with adhesion. Once dry, apply wood filler that matches your cabinet color as closely as possible, slightly overfilling the damaged area to account for shrinkage during drying. After the filler cures completely according to manufacturer instructions, sand the repair flush with the surrounding surface using progressively finer sandpaper, moving from 150-grit to 220-grit for a smooth finish.
Blending the repair into existing finishes requires attention to color matching and texture. Stain markers provide quick solutions for small scratches, available in dozens of wood tones that can be layered to achieve accurate color matches. For larger repairs, you may need to apply stain with a small artist’s brush, building color gradually through multiple light coats rather than one heavy application. After staining, protect the repair with a clear topcoat that matches your cabinet’s existing finish, whether that’s satin polyurethane, semi-gloss lacquer, or another protective coating. This sealing step prevents future damage and helps the repair blend seamlessly with surrounding surfaces.
Refinishing Cabinet Doors
When surface damage extends across entire doors or drawer fronts, spot repairs become less effective than complete refinishing. This process begins with careful removal of all hardware including hinges, knobs, and pulls, labeling each piece and its location for easy reinstallation. Chemical strippers or thorough sanding removes existing finishes, with chemical methods working faster but requiring proper ventilation and safety equipment. Sand all surfaces with 120-grit sandpaper to remove old finish remnants, then progress to 180-grit and finally 220-grit for a smooth surface that accepts new finish evenly.
Applying new finish requires patience and proper technique for professional results. Start with a wood conditioner on raw wood to prevent blotchy stain absorption, particularly important for softwoods like pine or cherry. Apply stain with a brush or cloth, working in the direction of the wood grain and wiping off excess after the recommended dwell time. Multiple thin coats produce better color depth than single heavy applications. After staining, apply three to four coats of clear protective finish, sanding lightly between coats with 320-grit sandpaper to ensure good adhesion and a glass-smooth final surface.
Structural Repair Methods
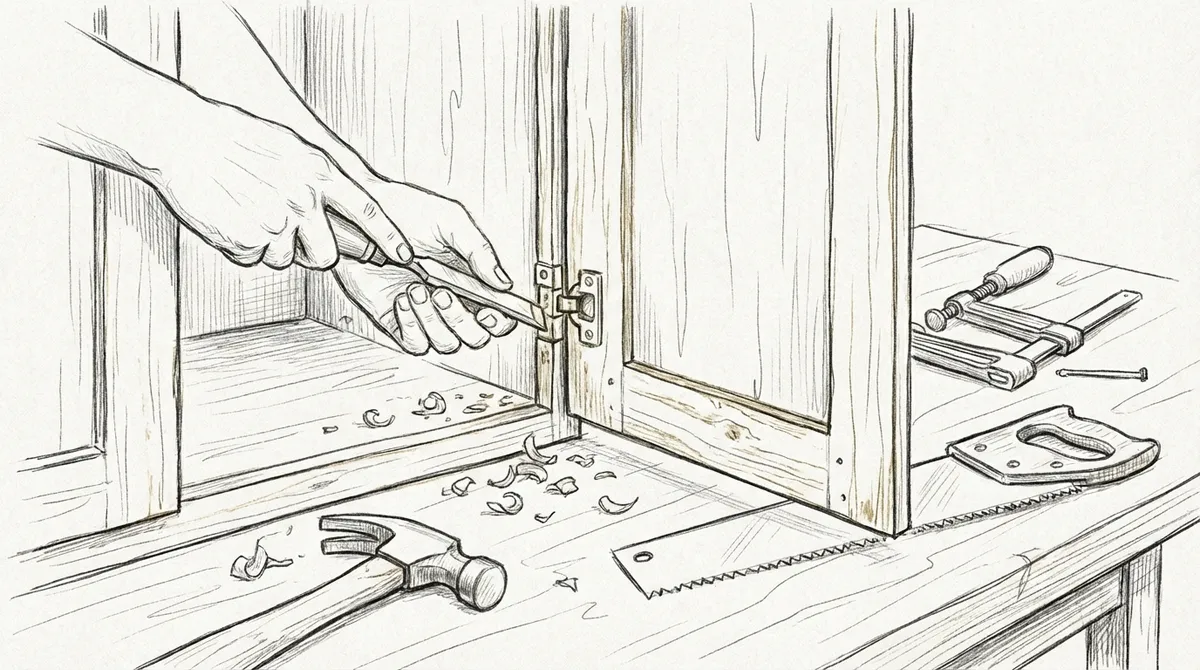
Structural repairs address problems that affect cabinet functionality and stability rather than just appearance. Loose hinges rank among the most common structural issues, typically caused by stripped screw holes where wood fibers have compressed or broken away. The most reliable repair involves filling stripped holes completely with wood glue and toothpicks or small dowels, allowing the glue to cure overnight before drilling new pilot holes slightly offset from the original positions. This technique creates fresh wood for screws to grip, restoring full hinge strength and proper door alignment.
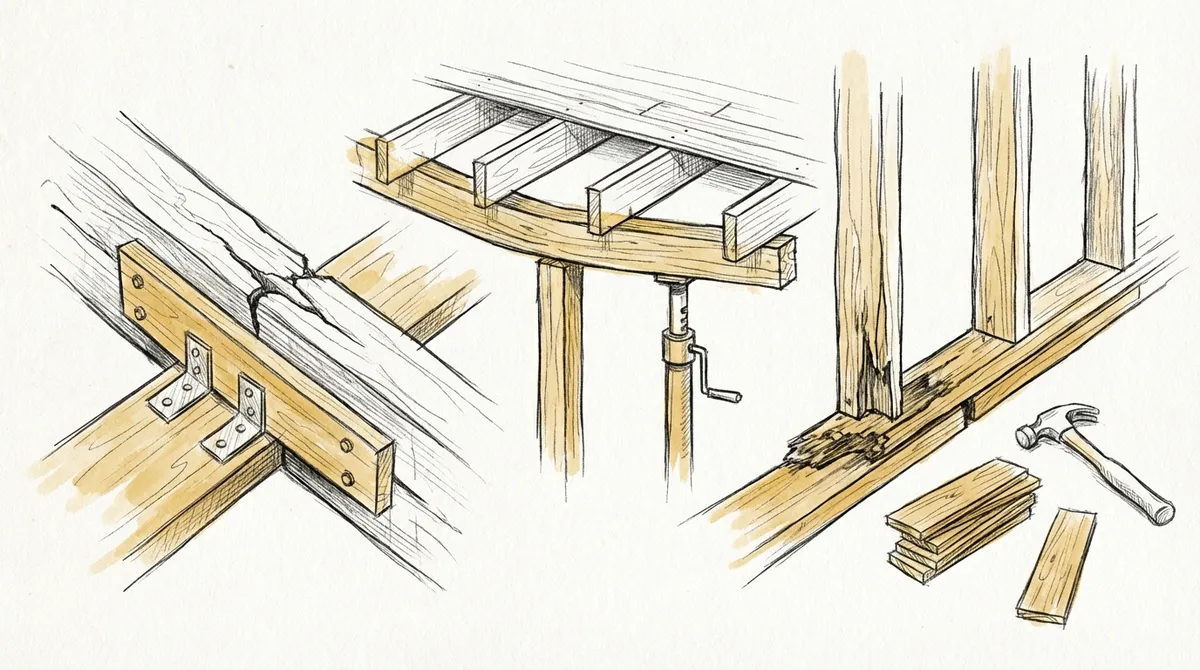
Cabinet box repairs tackle more serious structural concerns where the cabinet frame itself has weakened or failed. Corner joints may separate from age, moisture, or structural stress, requiring disassembly, cleaning of old glue, and regluing with modern adhesives that offer superior strength and moisture resistance. Reinforce repaired corners with corner brackets or wooden blocks glued and screwed into place for additional stability. When cabinet bottoms sag from years of supporting heavy dishware, install center support strips or replace the entire bottom panel with new plywood that won’t flex under load.
Fixing Drawer Problems
Drawer issues frustrate homeowners daily when drawers stick, derail, or refuse to close properly. Most drawer problems stem from worn or damaged slides rather than the drawer box itself. Replacing drawer slides involves removing the drawer completely, unscrewing old slides from both the cabinet and drawer, and installing new slides according to manufacturer specifications. Modern soft-close slides offer substantial improvements over older designs, adding convenience while reducing wear on cabinet boxes from repeated impact. Take precise measurements before purchasing replacement slides to ensure proper fit and function.
Drawer box repairs address structural failures within the drawer itself. Loose joints where drawer sides separate from fronts or backs require similar treatment to cabinet corner repairs: clean out old glue, apply fresh wood adhesive, clamp firmly until cured, and reinforce with small screws or corner brackets if the joint experiences heavy stress. Broken drawer bottoms typically result from overloading or moisture damage, requiring complete replacement with new plywood cut to match original dimensions and secured in the bottom groove with small brads or staples.
Water Damage Restoration
Water damage presents unique challenges in cabinet repair because moisture affects wood at the molecular level, causing swelling, discoloration, and eventual rot if left unaddressed. Early-stage water damage appears as dark staining or slight swelling around sink bases and dishwasher areas. Address these issues immediately by identifying and fixing the water source, then allowing affected areas to dry completely before attempting repairs. Use fans or dehumidifiers to accelerate drying, typically requiring several days for thorough moisture removal from wood fibers.
Once dried, assess whether the wood has maintained structural integrity or requires replacement. Wood that feels soft or crumbles when pressed has begun rotting and must be cut away and replaced with fresh material. For wood that remains solid despite staining, sand away damaged surface layers until you reach unaffected wood, which may require aggressive sanding with 80-grit paper initially. After sanding, seal all surfaces with a moisture-resistant primer before refinishing to prevent future water penetration and damage recurrence.
Preventing Future Water Damage
Prevention proves far easier than repair when it comes to water damage in cabinets. Install waterproof mats under sinks to catch minor leaks before they contact cabinet bottoms, and regularly inspect plumbing connections for signs of moisture. Apply additional coats of polyurethane or specialized cabinet sealant to vulnerable areas, building thicker protective barriers in high-risk zones. Consider installing pull-out trays with raised edges in sink base cabinets to contain spills and make cleaning easier while protecting the cabinet structure itself.
Maintaining proper humidity levels in your home also protects cabinets from moisture-related damage. Excessive humidity causes wood to absorb moisture from the air, leading to swelling and warping, while extremely dry conditions cause shrinkage and cracking. Use exhaust fans during cooking and showering to remove moisture-laden air, and run a dehumidifier in particularly humid climates. These preventive measures extend cabinet lifespan significantly while reducing the frequency and severity of repairs needed over time.
Hardware Replacement and Upgrades
Sometimes the best cabinet repair involves strategic hardware replacement rather than attempting to restore failed components. Cabinet hinges wear out eventually, developing loose pins that cause sagging or squeaking during operation. Modern replacement hinges offer substantial improvements over hardware installed even ten years ago, with soft-close mechanisms that prevent door slamming and adjustable mounting that allows precise alignment corrections. When replacing hinges, match the style and mounting pattern of existing hardware when possible, or be prepared to fill old screw holes and drill new ones for different hinge configurations.
Drawer and door hardware refreshes can transform cabinet appearance while addressing functionality problems. Worn pulls and knobs not only look dated but may have loose mounting screws that damage cabinet surfaces through constant movement. Upgrading hardware requires measuring the center-to-center distance of existing mounting holes, called the pull’s center measurement, to find replacements that utilize existing holes and avoid additional drilling. When changing to a different hole spacing, fill old holes with wood filler, sand smooth, and carefully mark new hole positions before drilling to ensure proper alignment across all cabinets.
When to Call Professional Cabinet Experts
While many cabinet repairs fall within DIY capabilities, certain situations benefit from professional expertise and specialized equipment. Extensive water damage that affects multiple cabinets or has caused significant structural deterioration typically requires professional assessment to determine whether repair or replacement offers the best value. Professionals can evaluate hidden damage inside cabinet walls and boxes that homeowners might overlook, preventing future failures from inadequately addressed problems. Custom matching of existing finishes also challenges even experienced DIYers, with professionals having access to spray equipment and finishing materials that produce factory-quality results.
Complex carpentry tasks like custom cabinet modifications require advanced skills and precise measurements to maintain aesthetic cohesion. Bucheli Trim specializes in high-end custom carpentry work that seamlessly integrates with existing cabinetry, offering solutions when standard repair approaches fall short. Whether you need cabinet doors rebuilt to match historical styles or entirely new cabinet sections that blend with surrounding originals, experienced professionals deliver results that maintain your home’s value and visual appeal.
Cost Considerations
Understanding repair costs helps homeowners make informed decisions about DIY versus professional approaches. Simple repairs like tightening hardware or filling small scratches cost minimal amounts for materials, making them excellent DIY projects that build skills and confidence. Mid-range repairs including refinishing cabinet doors or replacing drawer slides involve moderate material costs and significant time investment, with professional services potentially saving dozens of hours while ensuring quality results. Major repairs or complete cabinet refacing projects represent substantial investments whether completed independently or professionally, with the decision often hinging on desired quality level and timeline constraints.
Compare repair costs against replacement expenses to guide decision-making. Quality cabinet sets represent major investments that homeowners naturally want to preserve, but repeatedly repairing severely damaged cabinets may cost more long-term than strategic replacement. Calculate material costs, tool purchases or rentals, and the realistic value of your time when evaluating repair feasibility. Professional estimates provide valuable benchmarks even if you ultimately complete work yourself, offering insight into project scope and potential complications you might not anticipate.
Maintaining Repaired Cabinets
After investing time and resources into cabinet repairs, proper maintenance protects your work and prevents future damage. Clean cabinets regularly with mild soap and water rather than harsh chemicals that strip protective finishes over time. Dry surfaces thoroughly after cleaning to prevent water spots and moisture penetration, paying particular attention to areas around sinks and faucets where water exposure occurs frequently. Avoid abrasive scrubbers that scratch finish surfaces, creating pathways for moisture intrusion and making cabinets more susceptible to future damage.
Periodic inspections catch small problems before they escalate into major repairs. Check hinge screws quarterly and tighten any that have loosened from regular use. Examine cabinet interiors for signs of moisture, pest activity, or finish deterioration that might indicate developing problems. Apply furniture polish or specialized cabinet conditioner annually to nourish wood and maintain finish luster, choosing products appropriate for your specific cabinet finish type. This ongoing attention extends the results of your repair work and keeps cabinets looking and functioning beautifully for years.
Advanced Repair Techniques
Experienced DIYers and professionals utilize advanced techniques for challenging cabinet repairs that restore severely damaged pieces to like-new condition. Veneer repair requires patience and precision, involving carefully removing damaged veneer sections, preparing substrate surfaces, and applying new veneer with contact cement that creates permanent bonds. Color matching new veneer to aged surrounding material challenges even experienced woodworkers, often requiring staining or toning to blend repairs invisibly. Specialized veneer tools including seam rollers and trimming guides ensure professional results that withstand close inspection.
Cabinet door reconstruction addresses damage so extensive that surface repairs prove inadequate. This process may involve replacing entire panels while preserving frames, or building completely new doors using original dimensions and style details. Advanced joinery techniques ensure strong, long-lasting construction that matches original cabinet quality. When working with historical or custom cabinets, matching architectural details like crown molding profiles or panel raising patterns requires specialized tooling and extensive woodworking knowledge that professionals develop through years of experience.
Eco-Friendly Repair Approaches
Environmentally conscious homeowners appreciate that cabinet repair inherently supports sustainability by extending product lifespan and reducing landfill waste. Choose repair materials that minimize environmental impact when possible, including water-based finishes that emit fewer volatile organic compounds than traditional solvent-based products. Low-VOC wood glues and fillers protect indoor air quality during and after repair work while providing performance comparable to conventional formulations. These products cost slightly more than traditional alternatives but offer health and environmental benefits that justify the premium for many homeowners.
Sustainable disposal of materials removed during repair projects demonstrates environmental responsibility. Wood scraps can often be repurposed for other projects or offered to local woodworkers and artists who value quality materials. Metal hardware should be recycled through appropriate channels rather than discarded with regular trash. Chemical strippers and finish removers require special disposal procedures to prevent environmental contamination, with most communities offering hazardous waste collection programs that accept these materials for safe processing.
Conclusion
Successfully repairing cabinets requires understanding damage types, selecting appropriate techniques, and knowing when professional expertise adds value beyond DIY approaches. From simple hardware adjustments to complex structural repairs, homeowners who invest time in learning proper methods can restore cabinet beauty and functionality while building valuable skills. Regular maintenance and prompt attention to developing problems prevent minor issues from escalating into expensive failures that threaten cabinet integrity.
Whether you’re addressing cosmetic concerns or tackling structural repairs, the techniques outlined in this guide provide a solid foundation for successful cabinet restoration. For complex projects or situations where professional results matter most, consider consulting with experts who bring specialized knowledge and equipment to challenging repairs. Reach out to experienced craftsmen who can assess your specific situation and recommend solutions that preserve your investment while maintaining your home’s aesthetic appeal.
Bucheli Trim’s commitment to craftsmanship and precision extends beyond new construction to restoration work that honors existing cabinetry while addressing modern performance expectations. Don’t let damaged cabinets diminish your home’s beauty and functionality when expert repair solutions can restore them to their original glory. Take the first step toward revitalized cabinetry by visiting us on Google to learn more about our cabinet services and see what satisfied customers throughout the Tampa Bay area are saying about the quality and attention to detail that sets professional cabinet work apart from standard repairs.
FAQs
Q: What is the most common cause of cabinet damage that requires repair?
A: Water damage ranks as the most common cause of cabinet deterioration, particularly around sink areas and dishwashers. Repeated exposure to moisture breaks down protective finishes and penetrates wood fibers, causing swelling, warping, discoloration, and eventual rot. Regular inspection and prompt repair of plumbing leaks prevents most water-related cabinet damage.
Q: How can I fix loose cabinet door hinges without replacing them?
A: The most effective method involves filling stripped screw holes with wood glue and toothpicks or small wooden dowels, allowing them to cure overnight. Once the glue has hardened completely, drill new pilot holes slightly offset from the original positions and reinstall the hinges with fresh screws. This technique restores full hinge strength by creating new wood for screws to grip properly.
Q: When should I repair cabinets versus replacing them entirely?
A: Repair makes financial sense when damage is localized and structural integrity remains sound, typically for issues like scratches, loose hardware, or minor water staining. Consider replacement when extensive water damage has caused wood rot, when cabinet boxes are pulling away from walls, or when repair costs approach 50-70% of replacement expenses. Professional assessment helps determine the most cost-effective approach for severe damage.
Q: What tools do I absolutely need for basic cabinet repair work?
A: Essential tools include screwdrivers in multiple sizes, wood glue, wood filler, sandpaper in various grits from coarse to fine, a putty knife, and a cordless drill with bits. These basic items handle most common repairs including hardware adjustments, surface scratches, and minor structural issues. More advanced repairs may require additional specialized tools like clamps, saws, or finishing equipment.
Q: How long does it typically take for cabinet repair projects to complete?
A: Timeline varies significantly based on damage severity and repair complexity. Simple hardware tightening or minor scratch repair takes under an hour, while refinishing cabinet doors requires several days including drying time between coats. Structural repairs involving wood replacement or extensive water damage remediation may extend across one to two weeks. Proper drying and curing times should never be rushed for lasting results.