Key Takeaways
-
Professional flooring installation requires comprehensive site assessment and precise preparation techniques like moisture testing and subfloor leveling.
-
Different flooring materials demand unique installation methodologies, with professionals using specialized tools and techniques for optimal results.
-
Underlayment selection is critical for performance, affecting noise reduction, moisture protection, and overall flooring longevity.
-
Proper installation ensures manufacturer warranty compliance and can extend flooring lifespan from 10 to 30 years.
-
Professional installers coordinate with other trades to ensure seamless integration and prevent costly installation mistakes.
-
Subfloor imperfections like unevenness or moisture issues require systematic remediation to prevent future flooring failures.
Professional flooring installation represents a pivotal investment in your home’s aesthetic appeal, functionality, and long-term value. Whether you’re renovating an existing space or building from the ground up, the quality of your flooring installation can dramatically affect your daily living experience. Many homeowners underestimate the complexity involved in proper installation techniques, often discovering too late that DIY approaches or cut-rate contractors can lead to costly mistakes. Understanding the flooring installation process, from material selection to final finishing touches, empowers you to make informed decisions that will serve you well for decades. This comprehensive guide explores how professional flooring installation transforms residential spaces through expert craftsmanship, proper preparation, and attention to detail that only experienced professionals can provide.
Understanding the Fundamentals of Flooring Installation
Flooring installation encompasses far more than simply laying materials on a subfloor. The process requires comprehensive knowledge of substrate preparation, moisture management, thermal expansion considerations, and manufacturer specifications that vary significantly across different flooring types. Professional installers assess structural integrity, identify potential issues before they become problems, and implement solutions that ensure longevity and performance. The foundation of any successful installation lies in proper subfloor preparation, which includes leveling uneven surfaces, addressing moisture concerns, and creating the optimal conditions for your chosen flooring material.
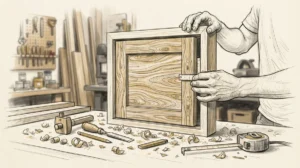
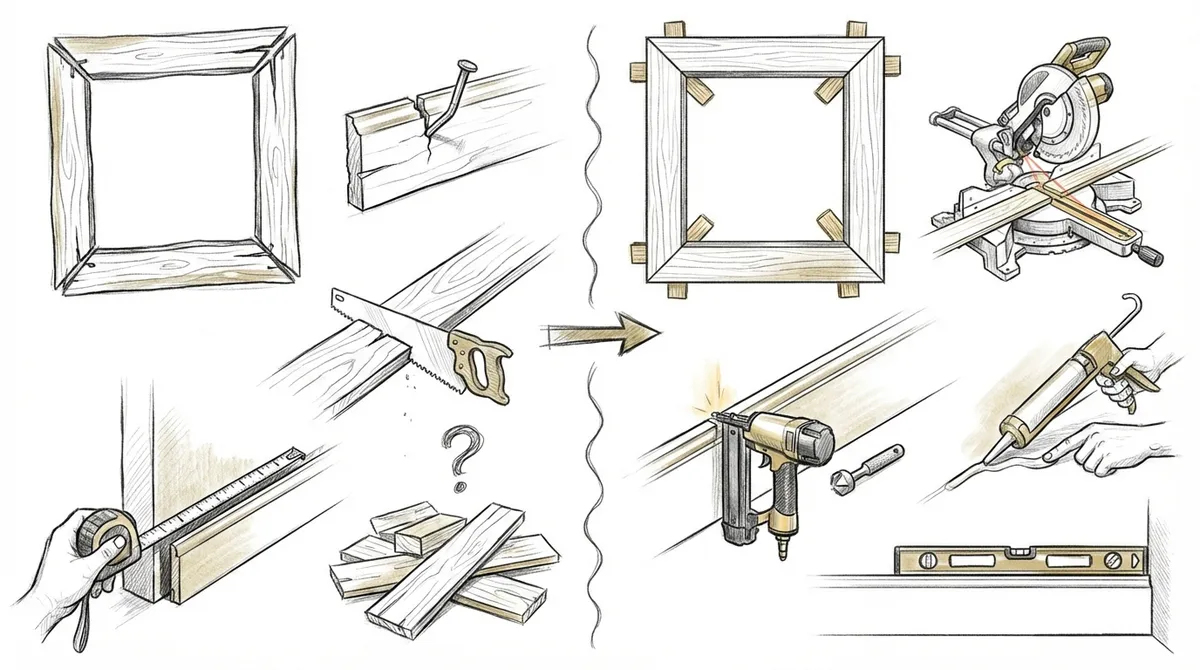
Different flooring materials demand distinct installation methodologies. Hardwood flooring requires acclimation periods, precise nailing patterns, and strategic planning for wood grain direction. Tile installations necessitate careful layout planning, proper adhesive selection, and meticulous grouting techniques. Luxury vinyl and laminate flooring depend on perfectly level surfaces and appropriate underlayment choices. Each material presents unique challenges that experienced professionals navigate with expertise developed through years of hands-on experience. Professional flooring services ensure these critical details receive proper attention throughout the installation process.
Essential Pre-Installation Preparation Steps
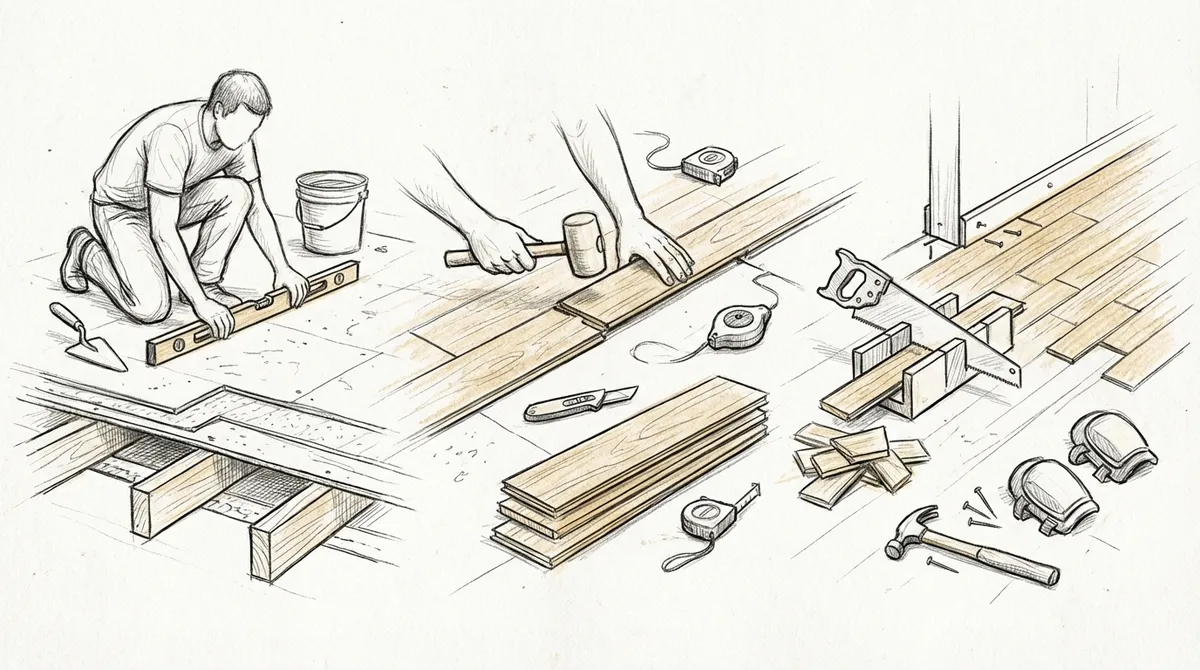
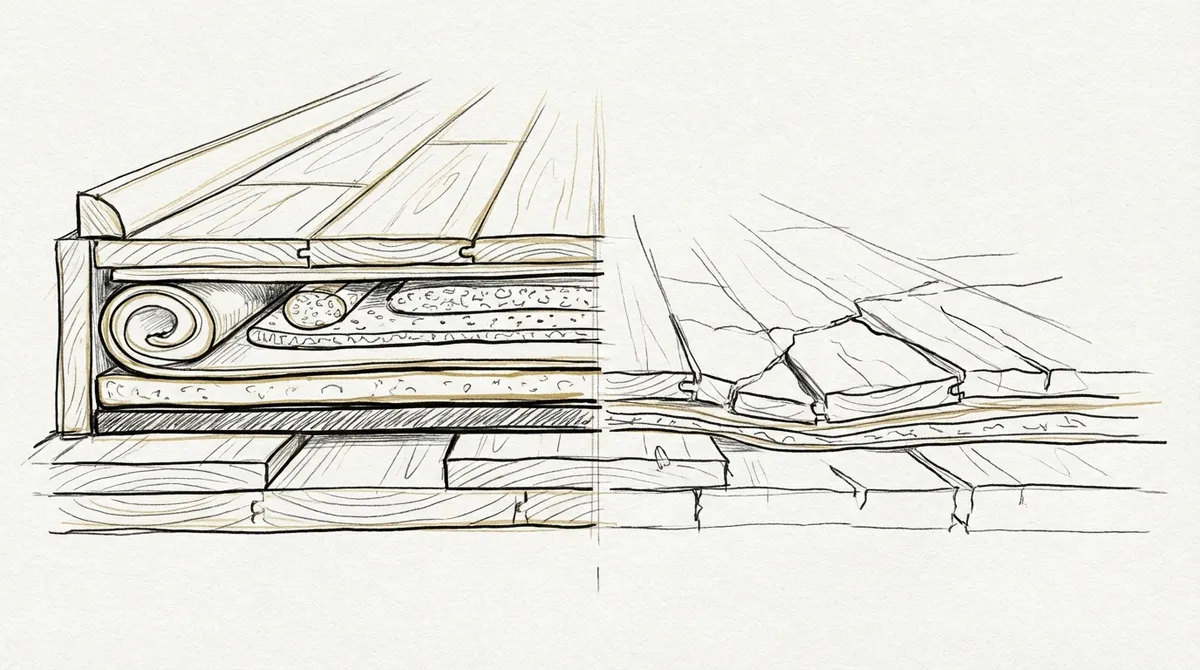
Before any flooring material touches your subfloor, professionals conduct thorough site assessments that determine installation success. This preparation phase includes moisture testing, which prevents future problems like warping, cupping, or mold growth. Concrete subfloors must be tested for moisture content using calcium chloride tests or relative humidity probes. Wood subfloors require inspection for structural soundness, squeaks, and proper ventilation in crawl spaces beneath.
Subfloor leveling represents another critical preparation step that amateur installers frequently overlook. Professional installers use self-leveling compounds, grinding equipment, or specialized underlayments to create surfaces that meet manufacturer flatness requirements, typically within 3/16 inch over 10 feet for most flooring types. This precision prevents lippage in tile installations, gapping in laminate floors, and premature wear patterns in all flooring materials.
| Flooring Type | Acclimation Time | Subfloor Moisture Limit | Temperature Requirements |
|---|---|---|---|
| Solid Hardwood | 7-14 days | 12% or less | 60-80°F |
| Engineered Wood | 3-5 days | 14% or less | 60-80°F |
| Luxury Vinyl | 48 hours | 5 lbs/1000 sq ft | 65-85°F |
| Ceramic Tile | Not required | Varies by substrate | 50-90°F |
| Laminate | 48-72 hours | 4 lbs/1000 sq ft | 64-86°F |
The Professional Installation Process Explained
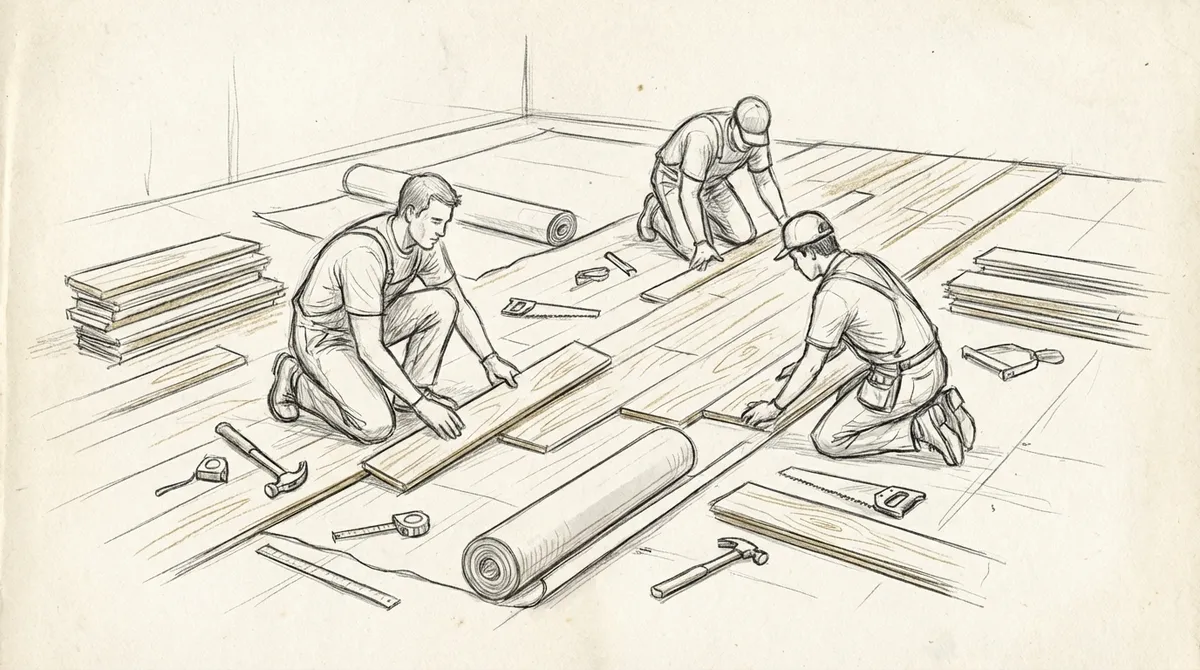
Professional flooring installation follows systematic procedures that ensure consistent quality across every square foot of your project. The process begins with precise measurements and layout planning that minimize waste while maximizing visual appeal. Experienced installers consider room dimensions, natural light sources, architectural features, and traffic patterns when planning installation patterns. This strategic approach prevents awkward cuts near doorways, ensures balanced border widths, and creates visually pleasing outcomes that enhance your home’s interior design.
During installation, professionals employ specialized tools and techniques that DIY enthusiasts typically lack. Custom carpentry expertise becomes particularly valuable when integrating flooring with existing architectural elements like staircases, built-in cabinetry, and trim work. Pneumatic nailers ensure consistent fastening patterns in hardwood installations. Wet saws with diamond blades create precise tile cuts. Specialized tapping blocks and pull bars enable tight seam connections in floating floor installations. These professional-grade tools, combined with expert technique, produce results that dramatically outperform amateur efforts.
Material-Specific Installation Techniques
Hardwood flooring installation demands particular attention to expansion gaps, nail placement, and board selection for color and grain variation. Professional installers begin with starter rows that establish perfect alignment, using pneumatic floor nailers for subsequent courses while hand-nailing in areas where power tools cannot reach. They strategically place boards to distribute color variations evenly and position shorter pieces away from high-visibility areas. Racking techniques ensure random appearance while avoiding H-joints or stair-stepping patterns that compromise structural integrity and visual appeal.
Tile installation requires comprehensive knowledge of adhesive types, trowel notch sizes, and layout strategies that minimize small cuts and maximize symmetry. Professionals establish reference lines using laser levels, ensuring perfectly square installations despite room irregularities. They employ proper troweling techniques that achieve full adhesive coverage, preventing hollow spots that lead to cracking. Spacers maintain consistent grout joints, while tile leveling systems eliminate lippage between adjacent tiles. These precision techniques create installations that look beautiful and perform flawlessly for decades.
Common Installation Challenges and Professional Solutions
Even the most straightforward flooring projects present challenges that require professional problem-solving skills. Out-of-square rooms, multiple doorways, irregular floor levels between spaces, and integration with existing flooring all demand creative solutions that maintain visual harmony while adhering to technical requirements. Professional installers draw upon extensive experience to address these challenges efficiently, often implementing solutions that homeowners never considered possible.
Moisture-related issues represent perhaps the most common challenge in flooring installation, particularly in basements, bathrooms, and kitchens. Professionals employ various moisture mitigation strategies including vapor barriers, moisture-blocking primers, and specially designed underlayments. They understand which flooring materials perform best in moisture-prone environments and can recommend alternatives when original selections prove unsuitable for specific conditions.
Addressing Subfloor Imperfections
Subfloor problems frequently surprise homeowners during flooring projects, but professionals anticipate and address these issues systematically. Squeaky floors receive additional fastening or shimming before new flooring installation. Damaged sections undergo repair or replacement. Uneven surfaces receive appropriate leveling treatments based on severity and substrate type. These remedial measures add upfront cost but prevent far more expensive problems later, protecting your flooring investment and ensuring optimal performance.
- Reinforcing weak or bouncy subfloors with additional joists or blocking
- Replacing water-damaged subfloor sections to prevent mold growth and structural deterioration
- Installing moisture barriers on concrete slabs to protect against vapor transmission
- Grinding high spots and filling low areas to achieve manufacturer-specified flatness tolerances
- Addressing squeaks through strategic fastening and shimming techniques
- Removing old adhesive residue that interferes with new flooring adhesion
The Importance of Proper Underlayment Selection
Underlayment selection significantly impacts flooring performance, comfort, and longevity, yet many homeowners overlook this critical component. Professional installers understand that different underlayments serve distinct purposes: sound reduction, moisture protection, thermal insulation, or smoothing minor subfloor imperfections. The appropriate choice depends on flooring type, subfloor composition, room location, and performance priorities. High-quality underlayments add modest cost but deliver substantial benefits including reduced noise transmission, improved warmth underfoot, and enhanced moisture protection.
Foam underlayments provide cushioning and sound dampening for laminate and engineered flooring installations. Cork underlayments offer superior acoustic properties and natural antimicrobial characteristics. Rubber underlayments deliver maximum sound reduction for multi-story buildings. Combination underlayments integrate vapor barriers with cushioning properties, providing comprehensive protection in single products. Professionals evaluate your specific requirements and recommend underlayments that optimize performance for your installation conditions and lifestyle needs.
Integration With Existing Home Elements
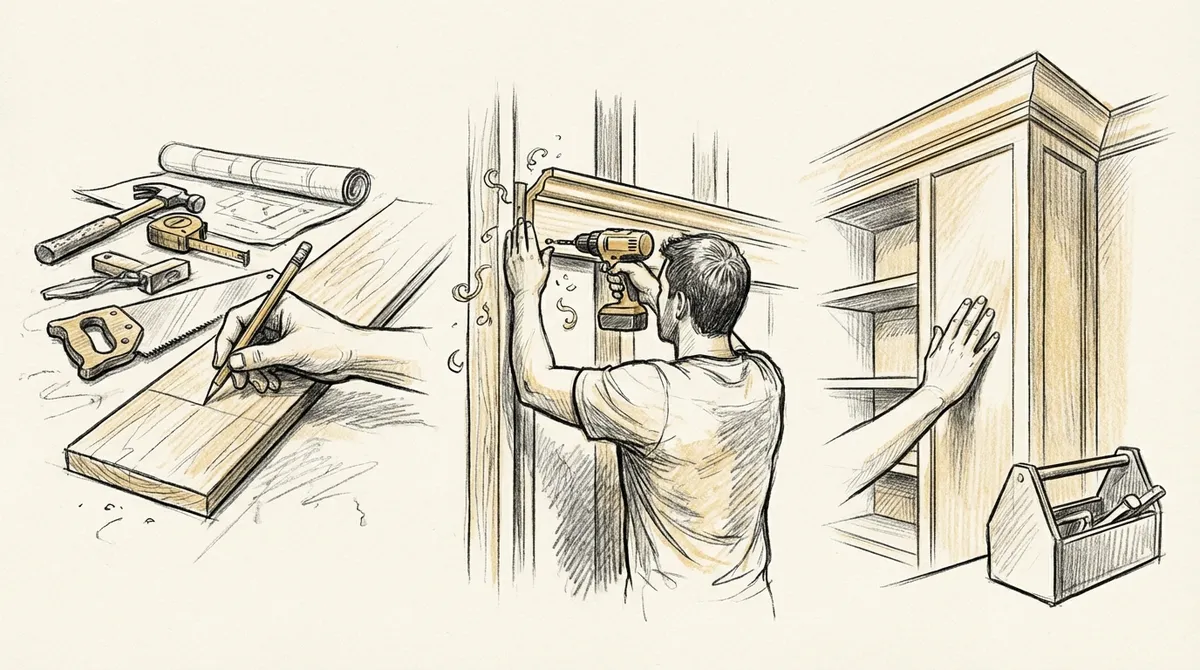
Professional flooring installation extends beyond the floor surface itself, encompassing thoughtful integration with walls, cabinets, staircases, and doorways. Trim and molding details create seamless transitions that give installations polished, finished appearances. Baseboards, quarter-round, reducers, thresholds, and stair nosing all require precise cutting, fitting, and fastening that complements both flooring and architectural style. These finishing touches separate professional installations from amateur attempts, elevating overall aesthetic impact while protecting floor edges from damage.
Doorway transitions present particular challenges requiring specialized transition strips that accommodate height differences between flooring types while maintaining accessibility compliance. Professionals select appropriate transition profiles—T-moldings, reducers, or end caps—based on specific conditions and aesthetic preferences. They ensure smooth transitions that prevent tripping hazards while maintaining visual continuity between spaces. These details matter tremendously in creating cohesive interior environments that flow naturally from room to room.
Coordinating With Other Trades
Successful flooring installation often requires coordination with other construction trades including electricians, plumbers, HVAC technicians, and painters. Professional installers understand construction sequencing and communicate effectively with other contractors to ensure work proceeds efficiently without conflicts or damage. They know when flooring should be installed relative to other trades—typically after drywall finishing, painting, and cabinet installation but before final trim work. This coordination prevents costly mistakes and ensures all elements integrate seamlessly.
- Schedule flooring installation after painting to prevent spills and damage to new floors
- Coordinate with electricians to ensure floor outlets are properly positioned before installation
- Work with HVAC contractors to address ductwork and register locations
- Communicate with plumbers regarding toilet flanges and appliance connections
- Arrange with cabinet installers for appropriate installation sequencing
- Coordinate final trim installation to properly conceal expansion gaps
Long-Term Performance and Warranty Considerations
Professional installation directly impacts warranty coverage for flooring products, with many manufacturers requiring certified installer involvement to honor guarantees. These warranties protect your investment against manufacturing defects and premature failure, but only when installation meets specified standards. Professional installers understand manufacturer requirements intimately and document their work appropriately, ensuring you receive full warranty protection. They also provide their own workmanship warranties, giving you additional peace of mind that installation quality meets professional standards.
Beyond warranty considerations, proper installation techniques dramatically extend flooring lifespan by preventing common failure modes. Correctly installed hardwood floors resist cupping, crowning, and gapping. Professionally laid tile remains crack-free and firmly bonded. Properly installed vinyl and laminate floors avoid peaking, separation, and premature wear patterns. These installation quality factors often determine whether flooring lasts 10 years or 30 years, making professional installation a wise long-term investment that pays dividends throughout your homeownership.
Cost Considerations and Value Proposition
While professional flooring installation costs more upfront than DIY approaches, the value proposition becomes clear when considering total lifecycle costs. Professional installations avoid expensive mistakes that require complete removal and reinstallation. They achieve optimal performance from flooring materials, maximizing lifespan and minimizing maintenance requirements. High-quality installation also enhances home resale value, as prospective buyers recognize and appreciate superior craftsmanship. These factors combine to make professional installation surprisingly cost-effective when viewed through a comprehensive financial lens.
Installation costs vary significantly based on flooring type, room configuration, subfloor condition, and regional labor rates. However, skimping on installation quality to save money frequently backfires, resulting in poor performance, premature replacement, and frustration. Experienced professionals provide accurate estimates that account for all project aspects, preventing surprise costs and budget overruns. They also complete projects efficiently, minimizing disruption to your household and allowing you to enjoy your new floors quickly. For homeowners seeking exceptional results, companies like Bucheli Trim LLC deliver craftsmanship and attention to detail that transform ordinary rooms into extraordinary spaces.
| Installation Cost Factor | Impact on Total Price | Professional Value Added |
|---|---|---|
| Subfloor Preparation | $1-3 per sq ft | Prevents future failures and warranty issues |
| Material Complexity | $2-8 per sq ft | Ensures proper techniques for specific materials |
| Room Configuration | $1-4 per sq ft | Creates visually appealing layouts and transitions |
| Removal/Disposal | $1-2 per sq ft | Handles demolition efficiently and safely |
| Finishing Details | $1-3 per sq ft | Provides polished, professional appearance |
Selecting the Right Flooring Professional
Choosing qualified flooring installers requires careful evaluation of credentials, experience, and reputation. Look for professionals with manufacturer certifications demonstrating technical competency with specific products. Request references from recent projects similar to yours, and actually follow up with those homeowners. Verify licensing and insurance coverage appropriate for your jurisdiction. Examine portfolios showcasing completed work, paying attention to finishing details and overall craftsmanship quality. These due diligence steps help identify installers capable of delivering results that meet your expectations.
Beyond technical qualifications, assess communication skills and professionalism during initial consultations. Quality installers listen carefully to your preferences, explain options clearly, and provide detailed written estimates covering all project aspects. They answer questions patiently and address concerns proactively. They arrive punctually, maintain clean work sites, and treat your home respectfully. These professional behaviors indicate individuals who take pride in their work and prioritize customer satisfaction alongside technical excellence. Check reviews and ratings to gain additional insights into installer reliability and performance.
Questions to Ask Potential Installers
Thorough interviews help identify flooring professionals best suited for your project. Ask about specific experience with your chosen flooring material and room conditions. Inquire about their approach to subfloor preparation and moisture testing. Request information about warranty coverage for both materials and labor. Discuss project timelines and how they handle unexpected complications. Understanding their processes and philosophies helps you make informed decisions and establishes realistic expectations for project outcomes.
- How many years of experience do you have installing this specific flooring type?
- Are you certified by manufacturers of the materials we’re considering?
- What percentage of your business comes from repeat customers and referrals?
- How do you handle subfloor issues discovered during installation?
- What warranties do you provide on your installation work?
- Can you provide references from recent projects similar to ours?
- How do you protect existing finishes and furnishings during installation?
- What happens if we’re not satisfied with the completed work?
Maintenance Requirements for Different Flooring Types
Professional installers provide valuable guidance on maintenance practices that preserve flooring beauty and performance. Different materials require distinct cleaning approaches, and improper maintenance can void warranties or cause premature deterioration. Hardwood floors benefit from regular dust mopping and occasional damp cleaning with pH-neutral cleaners specifically formulated for wood. Tile floors tolerate more aggressive cleaning but require periodic grout sealing. Luxury vinyl and laminate floors need specialized cleaners that don’t leave residue or cause streaking. Understanding these requirements helps you protect your flooring investment long-term.
Beyond routine cleaning, professional maintenance recommendations include strategies for preventing damage. Furniture pads protect against scratches and dents. Entry mats trap dirt and moisture before they reach flooring surfaces. Appropriate humidity levels prevent expansion and contraction issues in wood flooring. Prompt spill cleanup prevents staining and moisture damage. Following professional maintenance guidance ensures your floors look beautiful and perform optimally throughout their intended lifespan, maximizing your installation investment.
The Bucheli Trim LLC Difference in Flooring Installation
When homeowners throughout the Tampa Bay area seek flooring installation that combines technical expertise with artistic sensibility, Bucheli Trim LLC delivers exceptional results that exceed expectations. Their comprehensive approach encompasses thorough site preparation, meticulous installation techniques, and thoughtful integration with existing architectural elements. Whether installing hardwood in living areas, tile in bathrooms, or luxury vinyl in kitchens, their craftsmen bring dedication to quality that transforms ordinary rooms into showcase spaces. Their attention to detail extends to finishing touches that distinguish superior installations from merely adequate ones.
Bucheli Trim LLC’s flooring services complement their expertise in ceiling designs, wall enhancements, and custom cabinetry, providing homeowners with comprehensive carpentry solutions from a single trusted source. This integrated approach ensures cohesive design execution where all elements work harmoniously together. Their commitment to craftsmanship, combined with responsive customer service and transparent communication, makes them a preferred choice for discerning homeowners who refuse to compromise on quality.
Conclusion: Investing in Professional Flooring Installation
Professional flooring installation represents far more than an expense—it’s an investment in your home’s beauty, functionality, and value that pays dividends for decades. The expertise, specialized tools, and systematic processes that professionals bring to projects ensure optimal performance and longevity from your flooring materials. While DIY approaches or bargain installers might seem attractive initially, the long-term costs of poor installation—premature replacement, warranty voidance, and daily frustration—far exceed savings from professional services. Quality installation protects your flooring investment while creating beautiful, durable surfaces that enhance your daily living experience.
Whether you’re renovating a single room or transforming your entire home, selecting qualified flooring professionals establishes the foundation for success. Their knowledge prevents costly mistakes, their craftsmanship delivers superior results, and their warranties provide peace of mind. By understanding the flooring installation process, recognizing quality indicators, and asking informed questions, you position yourself to make decisions that serve your home well for years to come. Ready to transform your home with professional flooring installation? Contact Bucheli Trim LLC today to discuss your flooring project and discover how expert craftsmanship creates lasting beauty and exceptional performance in every room of your home.
FAQs
Q: How long does professional flooring installation typically take?
A: Installation duration varies based on flooring type, room size, and subfloor condition. Most standard rooms require 1-3 days for completion, including preparation and finishing. Larger projects or those requiring extensive subfloor work may extend to 5-7 days. Professional installers provide accurate timelines during initial consultations based on your specific project parameters.
Q: What subfloor preparation is necessary before installing new flooring?
A: Essential preparation includes moisture testing, leveling to manufacturer specifications (typically within 3/16 inch over 10 feet), and addressing structural issues like squeaks or damaged sections. Concrete subfloors may require grinding or self-leveling compounds, while wood subfloors need inspection for stability and proper ventilation. Proper preparation prevents installation failures and ensures optimal flooring performance.
Q: Can I install flooring over existing floors?
A: Some flooring types can be installed over existing materials if conditions are appropriate. Laminate and luxury vinyl often work over existing vinyl or tile if surfaces are level and stable. However, hardwood and tile typically require removal of existing flooring to ensure proper adhesion and performance. Professional installers assess existing conditions and recommend the most appropriate approach for your situation.
Q: How do I choose between different flooring installation methods?
A: Selection depends on flooring type, subfloor composition, and room conditions. Nail-down installation suits solid hardwood on wood subfloors. Glue-down methods work for engineered wood and vinyl on concrete. Floating installations accommodate laminate and engineered wood with minimal subfloor preparation. Professional installers evaluate your specific conditions and recommend methods that optimize performance and longevity while meeting manufacturer warranty requirements.
Q: What warranty coverage should I expect from professional installation?
A: Reputable professional installers provide workmanship warranties ranging from one to five years, covering installation defects and failures. Additionally, manufacturer warranties on materials (typically 10-25 years) often require professional installation for validity. Comprehensive warranty coverage protects your investment and demonstrates installer confidence in their craftsmanship. Always request written warranty terms before project commencement.