Key Takeaways
-
Measure room perimeters precisely and add 10-15% extra material for waste and cutting errors.
-
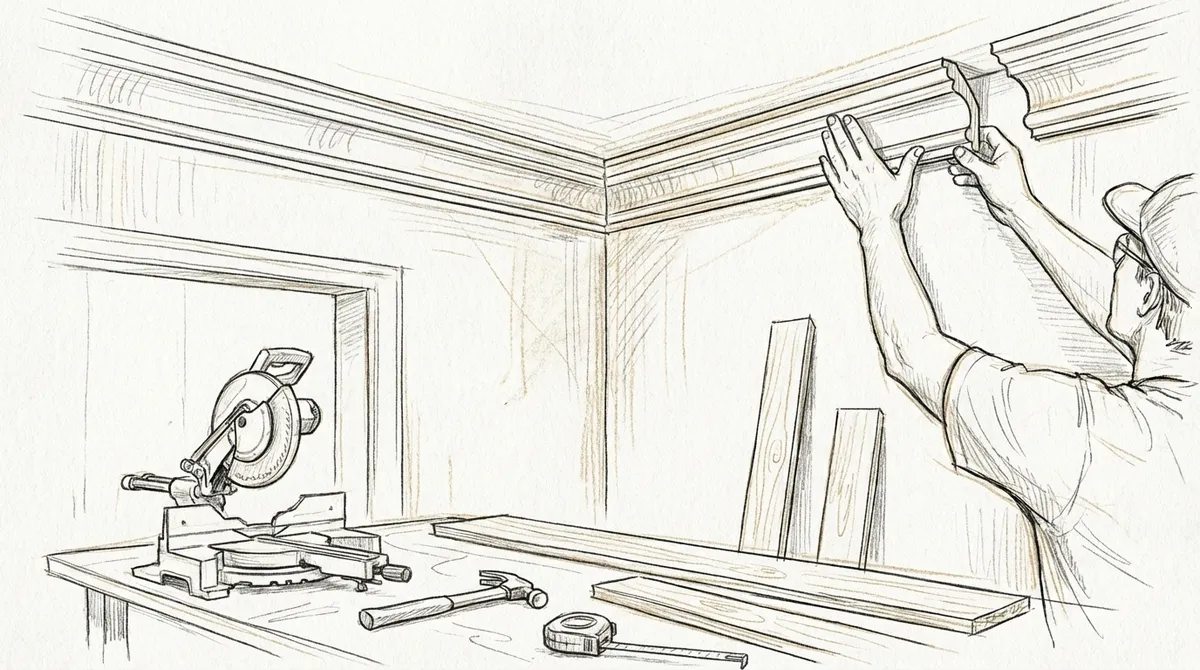
Use a compound miter saw for accurate angled cuts, setting the correct miter and bevel angles for your crown molding's spring angle.
-
Create coped joints for inside corners to ensure a tight, professional-looking fit that accommodates wall movement.
-
Choose the right crown molding material based on room conditions: wood for traditional looks, MDF for paintability, or PVC for moisture-prone areas.
-
Apply construction adhesive in continuous beads along wall and ceiling edges before nailing to ensure strong, gap-free attachment.
-
Select crown molding width proportional to ceiling height: 3-4 inches for standard 8-foot ceilings, 5-7 inches for taller rooms.
-
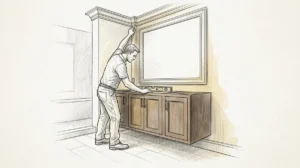
Install molding starting from the wall opposite the room's entrance to practice technique and minimize visible imperfections.
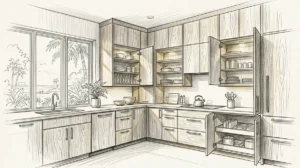
Crown molding installation transforms ordinary rooms into elegant spaces by creating a sophisticated transition between walls and ceilings. This decorative architectural element has graced homes for centuries, and with the right techniques and tools, you can achieve professional-quality results as a DIY homeowner. According to the National Association of Realtors, properly installed crown molding can increase a home’s perceived value by up to 5%, making it one of the most cost-effective home improvement projects available. Whether you’re working with traditional wood, modern MDF, or versatile PVC materials, understanding the fundamental principles of crown molding installation will enable you to tackle this rewarding project with confidence. This comprehensive guide will walk you through every step of the process, from selecting materials and gathering essential tools to mastering cutting techniques and achieving seamless corner joints that rival professional craftsmanship.
Understanding Crown Molding Materials and Styles
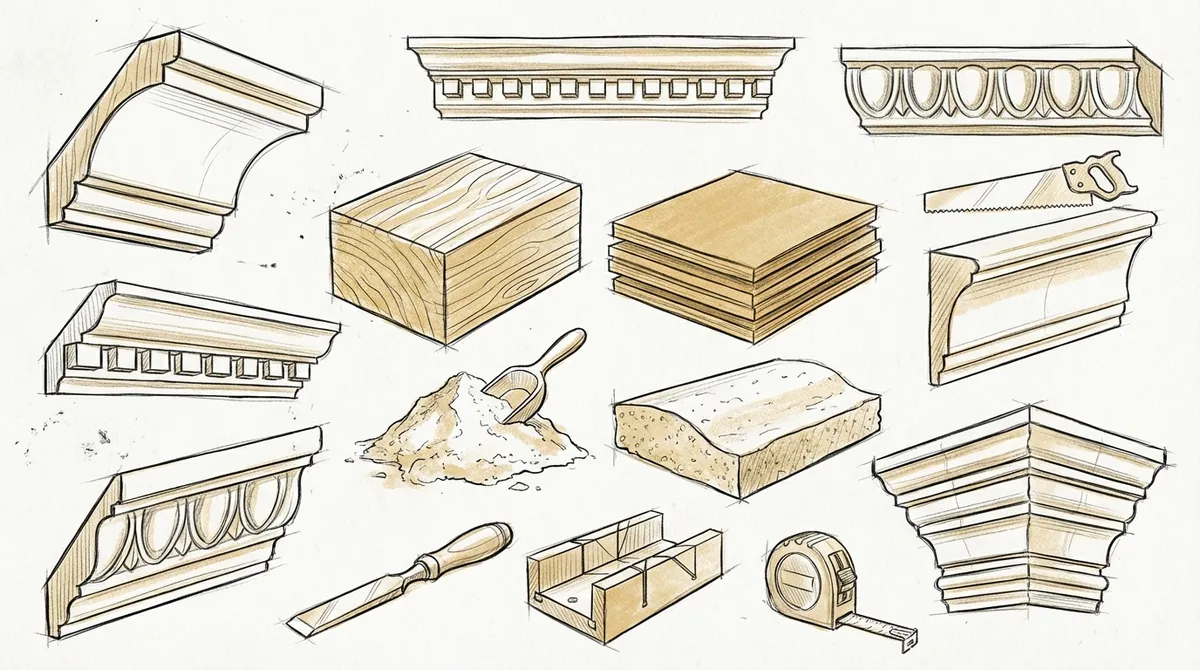
Before beginning your installation project, selecting the appropriate crown molding material is essential for achieving optimal results. Traditional wood crown molding offers timeless beauty and can be stained or painted to match any décor. Popular wood species include pine, oak, and poplar, with pine being the most budget-friendly option for painted finishes. Medium-density fiberboard (MDF) has become increasingly popular due to its affordability, smooth surface, and resistance to warping. MDF crown molding comes pre-primed and accepts paint exceptionally well, making it ideal for painted applications. Polyurethane and PVC moldings offer superior moisture resistance, making them perfect for bathrooms and kitchens where humidity levels fluctuate.
Crown molding profiles range from simple cove designs to elaborate multi-piece installations. The most common profiles include traditional crown, which features a concave curve; dentil crown, which incorporates decorative tooth-like blocks; and cove molding, which creates a smooth, rounded transition. When selecting your crown molding size, consider your ceiling height and room proportions. Standard 8-foot ceilings typically accommodate 3 to 4-inch crown molding, while taller ceilings can support larger profiles of 5 to 7 inches or more. The spring angle of crown molding, typically 38 or 45 degrees, determines how the molding sits against the wall and ceiling, affecting your cutting angles and installation approach.
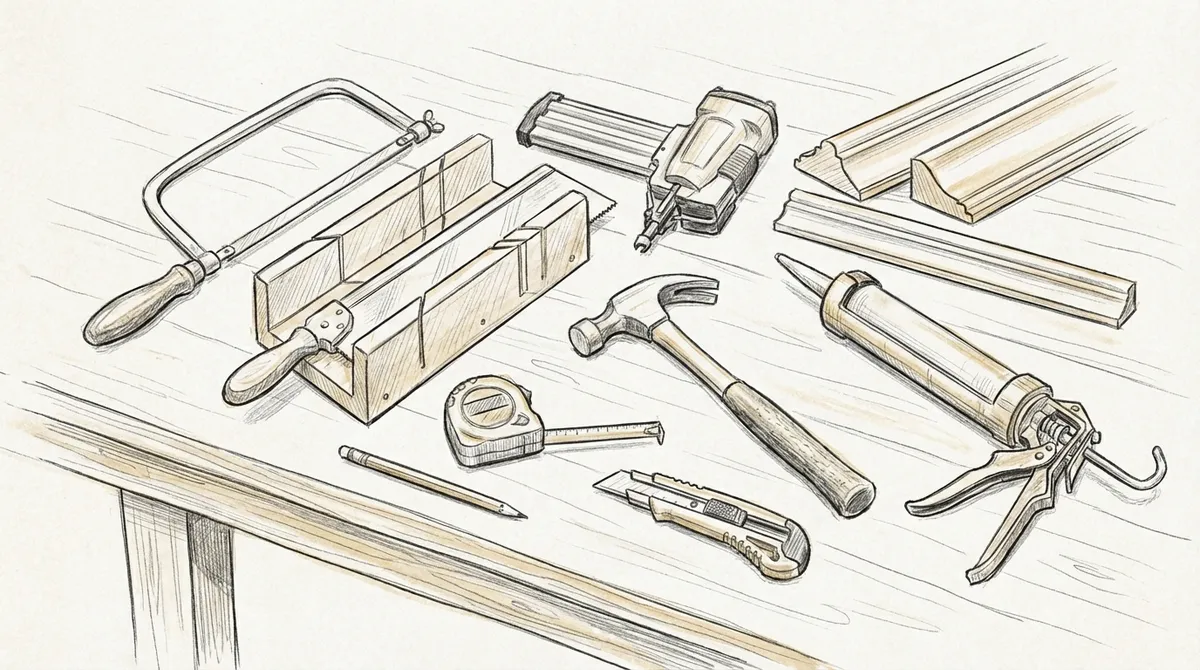
Essential Tools for Crown Molding Installation
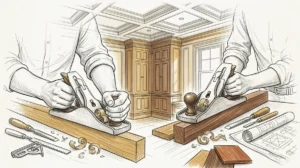
Professional-quality crown molding installation requires specific tools that ensure accuracy and efficiency throughout the project. A compound miter saw is absolutely essential for making precise angled cuts. This power tool allows you to set both miter and bevel angles simultaneously, which is crucial for creating tight-fitting corner joints. A 10-inch or 12-inch sliding compound miter saw provides adequate capacity for most crown molding profiles. For measuring and layout work, you’ll need a quality tape measure, pencil, and combination square to mark cutting lines accurately. A laser level or standard carpenter’s level ensures your molding installation remains perfectly horizontal around the entire room perimeter.
For securing crown molding to walls and ceilings, pneumatic nailers significantly speed up the installation process while reducing hand fatigue. A 15-gauge or 18-gauge finish nailer with 2-inch to 2.5-inch nails works well for most applications. If pneumatic tools aren’t available, a quality hammer and nail set allow manual nailing, though this method requires more time and precision. A coping saw with fine-tooth blades is indispensable for cutting coped joints on inside corners, which many professional carpenters prefer over mitered inside corners. Additional essential tools include a caulk gun for applying adhesive and filling gaps, a utility knife for trimming excess material, safety glasses for eye protection, and a sturdy stepladder or work platform for comfortable access to ceiling-level work areas.

Measuring and Planning Your Crown Molding Project
Accurate measurement forms the foundation of successful crown molding installation. Begin by measuring each wall length where crown molding will be installed, recording measurements to the nearest 1/8 inch. Add 10-15% extra material to your total linear footage calculation to account for cutting waste, mistakes, and corner pieces. Industry data from HomeAdvisor indicates that over 60% of DIY homeowners attempt crown molding installation as part of room upgrades, with proper planning being the key differentiator between successful and problematic installations. Create a detailed room diagram noting each wall measurement, corner type (inside or outside), and any obstacles such as heating vents or light fixtures that may require special attention.
Planning your cutting sequence maximizes material efficiency and minimizes waste. Start by identifying the longest walls in your room, as these sections should utilize full-length molding pieces whenever possible. Shorter wall sections and spaces between corners can accommodate shorter pieces created from scrap material or leftover sections. When planning corner joints, remember that inside corners typically use coped joints, while outside corners use mitered joints. Mark your diagram to indicate which end of each piece requires which type of cut, creating a clear roadmap for your cutting sequence. Professional carpenters from Bucheli Trim LLC’s molding details services recommend numbering each piece and its corresponding wall location to prevent confusion during installation.
Calculating Material Quantities
Determining the correct amount of crown molding requires careful calculation of your room’s perimeter plus additional allowances. Measure each wall separately rather than assuming rooms are perfectly square, as even new construction often contains slight dimensional variations. After calculating total linear footage, round up to the next even number and add 15% for waste. Crown molding typically comes in lengths of 8, 10, 12, or 16 feet, so plan your purchases to minimize joints while maximizing material usage. For a standard 12×14-foot room with 52 linear feet of perimeter, you would need approximately 60 feet of crown molding (52 feet plus 15% waste allowance).
Beyond the molding itself, calculate quantities for fasteners, adhesives, and finishing materials. Purchase 2-inch finish nails or brad nails in sufficient quantity, typically one box per 100 linear feet of molding. Construction adhesive specifically formulated for crown molding, such as Loctite Power Grab or Liquid Nails, typically covers 30-50 linear feet per tube, so plan accordingly. Painter’s caulk in a paintable, flexible formula is essential for filling gaps and creating seamless joints. Budget $100 to $300 for materials in a standard room, depending on material choice and room size, according to pricing data from major home improvement retailers.

Making Accurate Cutting Angles for Crown Molding
Mastering crown molding cutting techniques requires understanding the relationship between the molding’s spring angle and the saw’s miter and bevel settings. The two most common cutting methods are the compound cut method, where molding lays flat on the saw table, and the nested method, where molding rests against the saw fence at its installed angle. The compound method requires setting both miter and bevel angles on your saw, while the nested method uses only miter angle adjustments with the molding positioned upside down against the fence. For 45-degree spring angle crown molding using the compound method, inside corners require a 31.6-degree miter with a 33.9-degree bevel, while outside corners use the same angles but cut in opposite directions.
The nested cutting method simplifies angle settings by positioning the crown molding against the saw fence exactly as it will sit when installed. Place the molding upside down with the ceiling edge against the saw table and the wall edge against the fence. For inside corners, set your miter saw to 45 degrees left for the left-side piece and 45 degrees right for the right-side piece. Outside corners reverse these settings. Many professional carpenters prefer this method for its intuitive setup, though it requires sufficient saw capacity to accommodate the molding’s full profile. Creating a test corner with scrap material before cutting actual pieces ensures your angles are correctly set and prevents costly material waste.
Creating Perfect Coped Joints
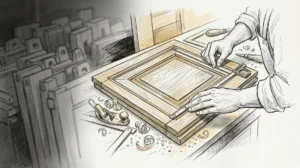
Coped joints provide superior fit quality for inside corners compared to simple mitered joints, particularly in older homes where corners may not be perfectly square. To create a coped joint, first install one piece of crown molding straight into the corner with a square cut. For the adjoining piece, begin with an inside corner miter cut as if creating a mitered joint. This cut reveals the molding’s profile along the cut edge. Using a coping saw with the blade angled slightly back for undercut, carefully cut along this revealed profile line, removing the waste material behind the face of the molding. The result is a piece whose cut end perfectly matches the profile of the installed piece, creating a tight, seamless joint even if the corner isn’t exactly 90 degrees.
Perfecting coping technique requires practice and patience. Mark the profile line clearly with a pencil before cutting, and work slowly with the coping saw to follow the contours precisely. Slight irregularities can be refined using sandpaper, a utility knife, or a small file to achieve a perfect fit. Test-fit the coped piece against the installed molding before final installation, making any necessary adjustments. Professional installations from skilled carpenters often feature coped inside corners because they accommodate wall settling and seasonal movement better than mitered corners, which can open up over time. The extra effort invested in coping inside corners pays dividends in long-term appearance and durability.
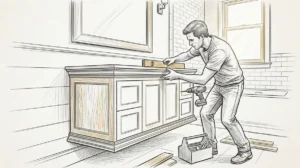
Installing Crown Molding Step by Step
The installation process begins with locating and marking ceiling joists and wall studs, as these structural members provide solid anchoring points for your fasteners. Use a stud finder to locate framing members, marking their positions lightly with a pencil above where the crown molding will sit. In rooms where ceiling joists run parallel to one or more walls, you may need to install backing blocks or a mounting strip to provide adequate nailing surface. A 1×2 or 1×3 board secured to wall studs just below the ceiling line creates a solid foundation for attaching crown molding when ceiling joists aren’t available for nailing.
Begin installation on the wall opposite the room’s entrance, as this location receives the least visual scrutiny and allows you to practice your technique before tackling more visible sections. Apply a generous bead of construction adhesive to both the wall and ceiling edges of your first piece, then position it carefully at the correct spring angle. Secure the molding with finish nails driven through both the top edge into ceiling joists and the bottom edge into wall studs, spacing fasteners approximately 16 inches apart. Drive nails at slight angles toward the wall or ceiling surface for maximum holding power. Use a nail set to countersink nail heads slightly below the molding surface, creating small depressions that will be filled with painter’s putty before finishing.
Working Around Corners and Obstacles
Installing crown molding around corners requires precise execution to achieve professional results. For outside corners, dry-fit both mitered pieces together before applying adhesive, checking that the joint closes tightly with no gaps. If the corner isn’t perfectly square, you may need to adjust your cutting angles slightly. When the fit is satisfactory, apply adhesive to both pieces and secure them individually, ensuring the mitered edges align perfectly as you nail them in place. For inside corners using coped joints, install the straight piece first, securing it completely before fitting the coped piece against it. Apply adhesive to the coped piece and carefully position it, checking that the coped edge seats fully against the installed molding’s profile before nailing.
Obstacles such as heating vents, electrical fixtures, or architectural features require special attention and custom cutting. Measure carefully from the last installed piece to the obstacle, transferring these measurements to your crown molding. For small obstacles like ceiling fixtures, you may need to create relief cuts or notches that fit around the obstruction. Light fixtures often require removing the fixture temporarily to install crown molding behind it, then reinstalling the fixture after molding installation is complete. Cabinet tops, built-in bookcases, and other architectural features may require returning the crown molding into the structure, which involves cutting small return pieces that terminate the molding profile cleanly. These custom solutions showcase the artistry possible with custom carpentry projects and distinguish professional-quality installations from amateur attempts.
Using Adhesives and Fasteners Correctly
Construction adhesive plays a crucial role in crown molding installation by providing continuous contact along the molding’s entire length and helping to close small gaps between the molding and irregular wall or ceiling surfaces. Premium adhesives formulated specifically for molding installation, such as Loctite Power Grab or Liquid Nails Heavy Duty, offer superior grab strength that holds molding in position while you secure it with fasteners. Apply adhesive in a continuous bead along both the wall and ceiling edges of the molding’s back, approximately 1/4 inch from the edges. This positioning ensures the adhesive spreads when pressed against surfaces without squeezing out beyond the molding’s face where it would require cleanup.
Finish nails or brad nails provide mechanical fastening that works in conjunction with adhesive for permanent, secure installation. For most crown molding applications, 2-inch to 2.5-inch finish nails in 15-gauge or 18-gauge provide adequate holding power without risk of splitting the molding or protruding through its face. Drive nails at alternating angles, with top edge nails angled upward into ceiling framing and bottom edge nails angled downward into wall studs. This angled nailing technique provides additional resistance to pulling forces and helps draw the molding tight against both surfaces. Space nails approximately 16 inches apart, with additional fasteners placed near joints and at any locations where gaps between the molding and wall or ceiling exceed 1/8 inch.
Simplified Installation with Corner Blocks
Corner blocks offer an alternative installation method that eliminates the need for complex miter and cope cuts, making crown molding installation more accessible for beginning DIYers. These decorative blocks, available in styles matching various crown molding profiles, install at inside and outside corners with all molding pieces simply butting into them with square cuts. This approach significantly reduces cutting complexity and speeds installation while creating a distinctive decorative element. Corner blocks work particularly well in traditional and Victorian-style interiors where decorative ornamentation complements the overall design aesthetic.
Installing crown molding with corner blocks begins with securing the blocks themselves at each corner location. Position blocks carefully at the correct height and spring angle, ensuring they’re level and properly aligned. Secure blocks with both adhesive and finish nails driven into solid framing. After all corner blocks are installed, measure the distance between blocks and cut crown molding pieces with simple 90-degree square cuts on both ends. These straight-cut pieces install between corner blocks, secured with the same adhesive and nailing techniques used for traditional installation. While corner blocks add material cost and create a more decorated appearance, they provide an excellent solution for DIYers uncomfortable with complex cutting angles or for rooms with numerous corners that would otherwise require extensive coping work.
Achieving Seamless Scarf Joints
Scarf joints connect two pieces of crown molding end-to-end along straight wall sections when wall length exceeds available molding lengths. Unlike butt joints, which create obvious seams, scarf joints feature overlapping 45-degree cuts that become nearly invisible when properly executed and finished. Creating a scarf joint requires cutting opposing 45-degree miters on the ends of two pieces that will join along a wall section. The first piece’s end receives a 45-degree cut with the long point on the molding’s face, while the second piece receives the opposite cut with the long point on the back. When overlapped and secured, these cuts create a nearly seamless joint that’s far less noticeable than a square butt joint.
Positioning scarf joints strategically minimizes their visibility and maximizes their structural integrity. Place scarf joints over wall stud locations whenever possible, as this provides solid backing for secure nailing through both overlapping pieces. Avoid placing scarf joints near corners or in highly visible locations such as directly above doorways or on walls that receive direct sight lines from the room’s entrance. Apply construction adhesive to both mating surfaces before joining, and secure the joint with finish nails driven through both pieces into the wall stud behind. For the most invisible scarf joints, plane or sand the overlapping edges slightly to create a perfectly flush transition between pieces before filling nail holes and caulking.
Filling Gaps and Finishing Crown Molding
Professional-quality crown molding installation requires meticulous attention to finishing details that transform acceptable installation into exceptional results. Small gaps inevitably occur at joints, nail holes require filling, and minor irregularities need correction before painting. Painter’s caulk designed for interior trim work provides the ideal material for filling gaps between crown molding and walls or ceilings. Choose a high-quality, paintable, flexible caulk that won’t crack or shrink over time. Apply caulk along the entire length where crown molding meets both walls and ceilings, using a caulk gun with steady pressure to create consistent beads. Smooth caulk lines immediately with a dampened finger or caulk smoothing tool, wiping away excess material with a damp cloth.
Fill all nail holes and minor surface imperfections with lightweight spackling compound or wood filler, depending on whether you’re finishing with paint or stain. For painted applications, apply filler slightly proud of the surface, allow it to dry completely, then sand smooth with 220-grit sandpaper. For stained wood crown molding, use color-matched wood filler applied carefully to avoid excess that could prevent proper stain absorption. After filling and caulking, inspect all joints carefully under good lighting, looking for any remaining gaps or irregularities. Additional caulk or filler may be necessary in spots where shrinkage occurred during drying. This meticulous finishing work separates DIY installations from the quality standards maintained by professional craftsmen at companies like Bucheli Trim LLC.
Painting Crown Molding for Professional Results
Proper painting technique ensures your crown molding installation looks factory-finished rather than obviously painted after installation. Begin with a thorough inspection of all filled areas, sanding any raised filler spots and ensuring all caulk lines are smooth and free of excess material. Clean all surfaces with a tack cloth or slightly damp rag to remove sanding dust and debris that would create a rough painted finish. If you’re installing raw wood or MDF crown molding, apply a quality primer to all surfaces before painting. Premium primers seal the wood, prevent tannin bleeding, and create uniform surface texture for optimal topcoat adhesion.
Apply finish paint using a high-quality angled brush designed for trim work, which provides superior control and coverage compared to rollers or standard brushes. Cut in carefully along the ceiling line first, maintaining a steady hand to create a clean paint line without getting paint on ceiling surfaces. Paint the molding face next, working in smooth, even strokes that follow the molding’s profile contours. For the wall-side edge, use the same careful technique to avoid getting paint on wall surfaces. Semi-gloss or satin finish paints work best for crown molding, as they provide durability and easy cleaning while highlighting the molding’s architectural details. Apply at least two coats for complete coverage and professional appearance, allowing proper drying time between coats according to the paint manufacturer’s recommendations.
Troubleshooting Common Crown Molding Installation Problems
Even experienced installers occasionally encounter challenges during crown molding installation. Gaps at corner joints represent the most common problem, typically resulting from walls or ceilings that aren’t perfectly straight or corners that vary from 90 degrees. For small gaps up to 1/8 inch, flexible painter’s caulk provides adequate solution. Larger gaps require different approaches depending on location and severity. Outside corner gaps sometimes respond to careful trimming of the mating surfaces using a sharp utility knife or block plane, removing small amounts of material until pieces fit tightly together. Inside corner gaps with coped joints may require additional coping work to better match the installed molding’s profile.
Molding that won’t seat tightly against walls or ceilings indicates either irregular substrate surfaces or incorrect spring angle during installation. In older homes, decades of paint buildup or plaster irregularities often create bumps and valleys that prevent consistent contact. Use a straightedge to identify high spots, then carefully scrape or sand them flat. Low spots or valleys can be filled with joint compound, allowed to dry, then sanded smooth before installation. When crown molding refuses to maintain its proper spring angle, the issue often stems from insufficient nailing into solid framing members. Installing backing blocks or nailer strips where solid framing is absent provides the necessary support for proper positioning. These problem-solving skills distinguish experienced installers and demonstrate why working with professionals from specialized ceiling design services can save time and frustration on complex projects.
Dealing with Uneven Walls and Ceilings
Older homes frequently present challenges of significantly uneven walls and ceilings that complicate crown molding installation. Before beginning installation in such conditions, assess the severity of irregularities using a long straightedge or laser level. Minor variations of 1/8 to 1/4 inch can be accommodated through flexible caulk and careful installation technique. More severe irregularities require substrate correction before crown molding installation. For ceiling problems, applying a skim coat of joint compound across the entire ceiling-wall junction creates a straighter surface for molding attachment. Wall irregularities may require furring strips or build-out techniques that create a level plane for installation.
When perfect substrate correction isn’t practical, flexible crown molding made from polymer materials offers a solution that conforms to irregular surfaces better than rigid wood or MDF. These materials bend and flex to follow substrate contours while maintaining their profile integrity. Another technique involves scribing the crown molding to match irregular surfaces, a process where you temporarily install molding pieces, mark where they contact and gap from surfaces, then remove material at high spots to achieve better fit. While time-consuming, scribing produces professional results on challenging surfaces. Understanding when to employ these advanced techniques versus when to call professional installers reflects realistic assessment of project complexity and skill level.
Safety Considerations for Crown Molding Installation
Crown molding installation involves working at heights, operating power tools, and handling long, unwieldy materials that present various safety hazards. Always wear ANSI-approved safety glasses when operating power saws, as flying wood chips and sawdust pose serious eye injury risks. Use hearing protection when running loud power tools for extended periods, as compound miter saws generate noise levels that can damage hearing with prolonged exposure. Dust masks or respirators protect respiratory health when cutting MDF or wood products that generate fine particulate matter. Proper personal protective equipment forms the foundation of safe workshop and installation practices.
Working at ceiling height requires stable, appropriate access equipment rather than improvised solutions. Use a sturdy stepladder rated for your weight plus tools and materials, or invest in a quality work platform that provides comfortable working height for extended ceiling-level tasks. Never overreach from ladders or platforms, as this creates dangerous instability that can result in falls. Keep your work area well-lit to ensure you can see clearly when positioning molding and driving fasteners near your face. When operating power saws, maintain full attention on the cutting operation, keep hands clear of blade paths, and wait for blades to stop completely before reaching near them. These fundamental safety practices protect you from the most common injuries associated with crown molding installation projects.
Cost Analysis and Budgeting for Crown Molding Installation
Understanding the complete cost picture helps you budget appropriately and decide between DIY installation and professional services. Material costs vary significantly based on crown molding type, with basic pine or MDF options starting around $1 to $3 per linear foot for simple profiles, while hardwood or elaborate profiles can cost $5 to $15 per linear foot or more. According to retail pricing data from Lowe’s, the average material cost for crown molding installation in a standard room ranges from $100 to $300, depending on material choice and room size. Beyond molding material itself, budget for adhesive ($8-12 per tube), fasteners ($10-15 per box), painter’s caulk ($5-8 per tube), and finishing materials including primer, paint, and sandpaper.
Tool investment represents another significant cost factor for DIYers without existing equipment. A quality compound miter saw suitable for crown molding work costs $200 to $500, while pneumatic nailers range from $100 to $300. Additional tools including levels, measuring devices, and hand tools add another $50 to $100. For a single project, these tool costs make DIY installation more expensive than hiring professionals. However, these tools provide value for multiple projects and ongoing home maintenance, justifying the investment for homeowners planning additional trim carpentry work. Professional installation typically costs $4 to $8 per linear foot for labor in addition to materials, making a standard room installation range from $400 to $1,200 total. Complex installations with multiple corners, high ceilings, or intricate profiles command premium pricing but deliver guaranteed quality results and time savings.
When to Call Professional Crown Molding Installers
While crown molding installation is an accessible DIY project for many homeowners, certain circumstances warrant hiring professional craftsmen. Complex architectural features, vaulted ceilings, or rooms with numerous outside corners significantly increase installation difficulty beyond basic rectangular rooms. Homes with plaster walls and ceilings present challenges including extreme hardness that complicates nailing and brittle materials that crack easily when fasteners are driven. High ceilings exceeding 10 feet require specialized access equipment and safety considerations that many DIYers aren’t equipped to handle. In these situations, professional installers bring experience, proper equipment, and efficiency that justify their cost.
Project scale also influences the DIY versus professional decision. Installing crown molding throughout an entire home represents a substantial time commitment that may span weeks or months for DIYers working evenings and weekends. Professional crews complete whole-house installations in days, minimizing disruption to household routines. Additionally, professionals carry liability insurance that protects homeowners from financial responsibility if accidents or property damage occur during installation. Companies specializing in architectural trim work, such as Bucheli Trim LLC, maintain high craftsmanship standards developed through years of experience, ensuring results that enhance home value and aesthetic appeal. For homeowners in the Tampa Bay area seeking flawless crown molding installation as part of comprehensive interior upgrades, connecting with experienced local craftsmen provides access to expertise that transforms ordinary rooms into showcases of architectural elegance.
Maintaining Crown Molding for Long-Lasting Beauty
Properly installed crown molding requires minimal maintenance but benefits from periodic attention that preserves its appearance and protects your investment. Dust accumulation along crown molding profiles creates a dingy appearance that’s particularly noticeable on white or light-colored finishes. Clean crown molding every few months using a microfiber duster or vacuum with soft brush attachment, working gently to avoid damaging painted or stained surfaces. For deeper cleaning, wipe surfaces with a slightly damp cloth and mild detergent solution, being careful not to saturate wood materials that could swell or warp from excessive moisture. Dry surfaces immediately with a clean, soft cloth to prevent water spots.
Inspect crown molding annually for signs of joint separation, caulk cracking, or fastener popping that indicates seasonal movement or settling. Small gaps that develop over time can be recaulked easily before they enlarge and become more noticeable. Touch up paint nicks and scratches promptly to prevent them from becoming more extensive problems. In humid climates, monitor crown molding for signs of moisture damage or mold growth, particularly in bathrooms and kitchens. Adequate ventilation and humidity control prevent these issues, but early detection allows intervention before significant damage occurs. These simple maintenance practices preserve the crisp, clean appearance that makes crown molding such an attractive architectural element and protect the time and money invested in installation.
Conclusion
Crown molding installation represents one of the most impactful home improvement projects available, transforming ordinary rooms into spaces with architectural distinction and elegance. By understanding material options, mastering essential tools and techniques, and following systematic installation procedures, homeowners can achieve professional-quality results that enhance both aesthetic appeal and property value. From precise cutting angles and seamless corner joints to meticulous finishing details, each aspect of the installation process contributes to outcomes that showcase craftsmanship and attention to detail. Whether you choose the DIY route armed with knowledge and appropriate tools, or partner with experienced professionals who bring years of expertise to your project, quality crown molding installation delivers lasting beauty and satisfaction.
For homeowners in the Tampa Bay area seeking exceptional crown molding installation and comprehensive custom carpentry services, reach out to Bucheli Trim LLC to discuss your vision and discover how expert craftsmanship transforms houses into homes of distinction. With dedication to precision, quality materials, and customer satisfaction, professional installation ensures your crown molding project exceeds expectations and provides enjoyment for years to come. Check out our customer reviews on Google to see why Tampa Bay homeowners trust our team for their most important carpentry projects.
FAQs
Q: What tools are essential for crown molding installation?
A: Essential tools include a compound miter saw for angled cuts, tape measure for accurate measurements, pneumatic finish nailer or hammer for securing molding, coping saw for inside corner joints, level for ensuring straight installation, caulk gun for adhesive application, and safety glasses for eye protection. A sturdy ladder or work platform is also necessary for comfortable access to ceiling-level work.
Q: How do I cut crown molding for inside and outside corners?
A: For outside corners, cut both pieces at 45-degree miters that join to form a 90-degree corner. For inside corners, professionals prefer coped joints: cut one piece square into the corner, then miter the second piece at 45 degrees and use a coping saw to cut along the revealed profile. This creates a joint that fits tightly even if the corner isn’t perfectly square.
Q: Can I install crown molding without professional help?
A: Yes, crown molding installation is accessible for DIY homeowners with basic carpentry skills, appropriate tools, and patience for detail work. Standard rectangular rooms with 8-foot ceilings present manageable projects for beginners. However, complex layouts, vaulted ceilings, or homes with significantly uneven walls and ceilings may warrant professional installation to ensure quality results and avoid costly material waste.
Q: What is the best adhesive for securing crown molding?
A: Premium construction adhesives specifically formulated for molding installation, such as Loctite Power Grab or Liquid Nails Heavy Duty, provide superior grab strength and long-term holding power. These adhesives work in conjunction with finish nails to secure molding, help close small gaps between molding and irregular surfaces, and create permanent, durable installations that resist seasonal movement and settling.
Q: How do I hide gaps in crown molding joints?
A: Small gaps up to 1/8 inch are easily concealed with high-quality, paintable, flexible painter’s caulk applied along joints and where molding meets walls and ceilings. Smooth caulk immediately with a dampened finger for clean lines. For nail holes and minor imperfections, use lightweight spackling compound or wood filler, allow to dry completely, then sand smooth before priming and painting for a seamless, professional finish.