Key Takeaways
-
Always confirm heat clearances and minimum mantel height with the fireplace manual and local building code before making any cuts, since wood near a firebox can dry out, crack, or ignite.
-
Anchor the mantel into wall studs or masonry with a steel cleat or heavy-duty brackets, never into drywall anchors alone, to keep a heavy mantel secure for decades.
-
Dry fit the mantel against the wall before fastening it to check for gaps, wall bumps, and level, and trim the back edge if the wall is uneven.
-
Match the mantel's trim profile to your baseboards, crown, and door casings so the piece looks like a finished part of the room rather than an add-on.
-
Choose heat-rated stains, paints, and sealers near the firebox, and plan the mantel depth and height early if a TV will hang above it.
-
Hire a professional for heavy beams, stone, or custom surrounds, since improper anchoring and clearance errors create real safety risks.
A fireplace mantel is often the first thing people notice when they walk into a room. It frames the hearth, anchors the wall, and sets the style for the whole space. But a mantel only looks great if it is installed well. A poor fit, a crooked shelf, or weak mounting can ruin the look and even create safety risks.
Fireplace mantel installation is a skilled carpentry task. It involves careful measuring, strong mounting, and strict attention to heat clearances. Homeowners, interior designers, and real estate developers all want the same result: a mantel that looks seamless, feels solid, and lasts for decades.
This guide explains how fireplace mantel installation works. You will learn about mantel types, safety rules, tools, and the exact steps pros follow. You will also learn when to call a custom carpenter and what to expect from the process in 2026.
What Is Fireplace Mantel Installation?
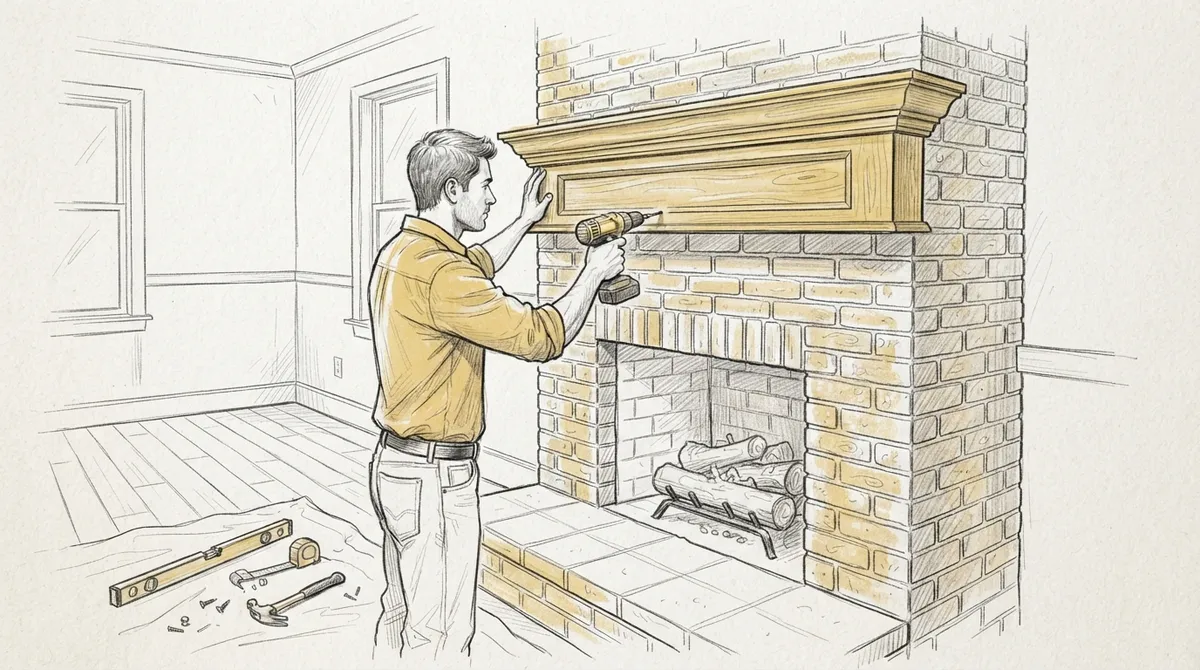
Fireplace mantel installation is the process of fitting a decorative frame or shelf around a fireplace opening. The mantel can be a simple floating shelf or a full surround with legs, a header, and a shelf. In carpentry, this work sits between structural framing and fine finish work.
A proper installation covers more than hanging a board on a wall. It includes:
- Measuring the fireplace opening and wall space
- Checking local fire codes and manufacturer clearances
- Locating wall studs and masonry anchor points
- Cutting and fitting the mantel to the wall
- Securing the mantel with strong, hidden hardware
- Sealing gaps and finishing the surface
Because the mantel sits close to heat, safety is just as important as style. That is why many homeowners hire a professional for this job.
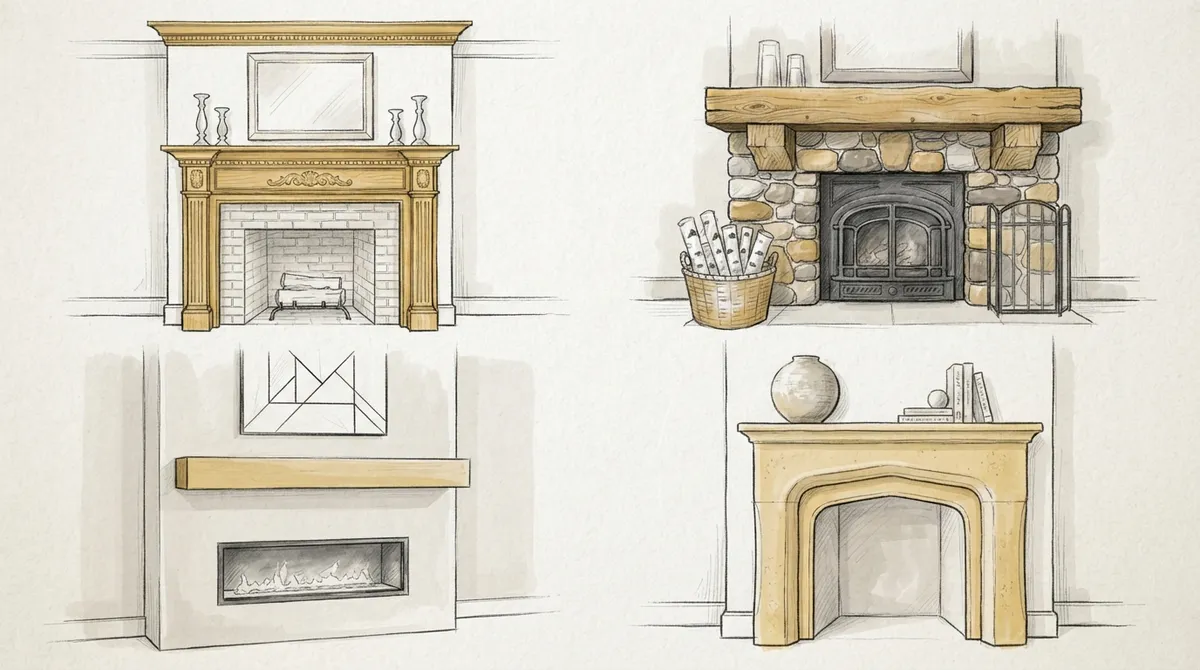
Types of Fireplace Mantels
Before installation begins, you need to choose the right mantel type. Each style needs a slightly different mounting method.
Floating Mantel Shelves
A floating mantel is a solid beam or hollow box that looks like it has no support. It hides a steel bracket or cleat inside the wall. This style is popular in modern homes and works well over gas or electric fireplaces.
Full Mantel Surrounds
A surround includes two side legs (pilasters), a header, and a shelf. It wraps the entire fireplace opening. This style gives the most dramatic look and often needs custom fitting to match the firebox size.
Beam Mantels
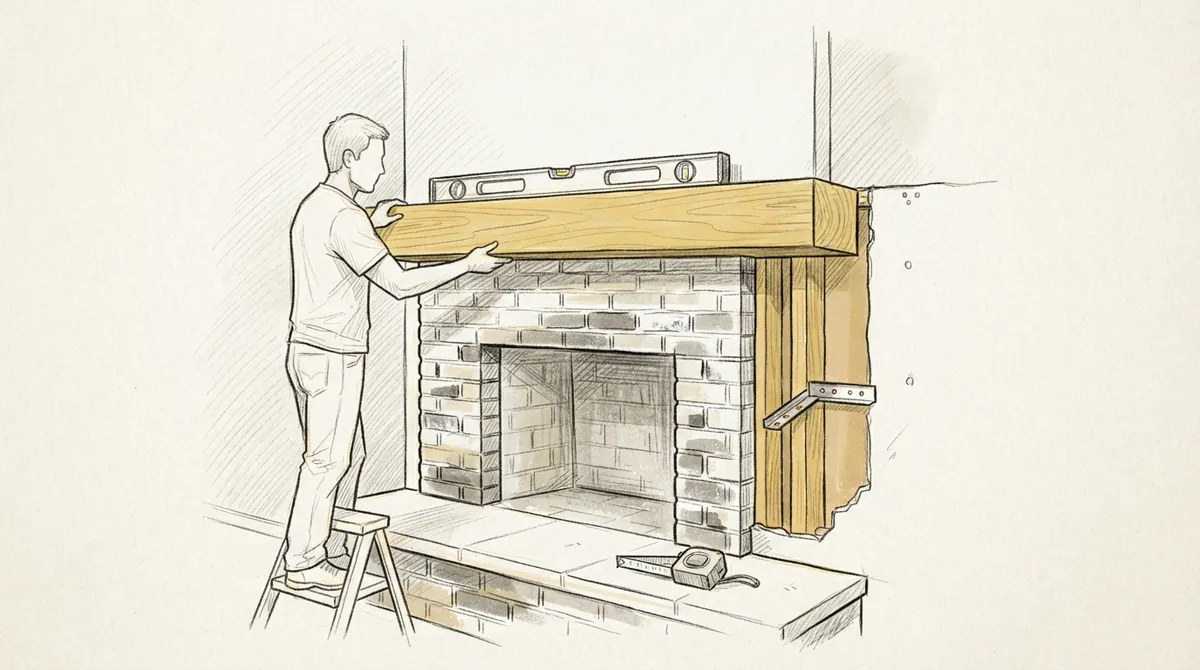
Beam mantels use a thick piece of wood, often reclaimed or hand-hewn. They add rustic warmth and character. Because beams are heavy, they need strong anchoring into studs or masonry.
Stone and Masonry Mantels
These mantels use cast stone, limestone, or brick. They are very heavy and usually need structural support. They are best set during a larger remodel.
Custom Millwork Mantels
A custom mantel is built to match your home’s trim, ceiling details, and cabinetry. Designers often choose this route for built-in looks. If you want a piece that fits your room exactly, read how to find and choose custom mantels near you.
Comparing Mantel Options
| Mantel Type | Best For | Mounting Method | Skill Level |
|---|---|---|---|
| Floating shelf | Modern and minimal rooms | Hidden steel cleat into studs | Intermediate to advanced |
| Full surround | Traditional and formal rooms | Attached to wall framing and hearth | Advanced |
| Beam mantel | Rustic and farmhouse styles | Heavy-duty brackets or lag bolts | Intermediate to advanced |
| Stone or cast mantel | Luxury and historic homes | Structural support and masonry anchors | Professional only |
| Custom millwork | Designer and built-in looks | Custom hardware and framing | Professional only |
Safety and Clearance Rules You Must Follow
Heat is the biggest risk in fireplace mantel installation. Wood can dry out, crack, or even ignite if it sits too close to a firebox. Always follow the fireplace maker’s instructions and your local building code.
Here are common guidelines to keep in mind:
- Combustible trim clearance: Wood trim often must sit a set distance from the firebox opening. This distance grows as the trim gets deeper.
- Mantel shelf height: Many codes ask for a minimum height between the top of the firebox and the underside of the shelf.
- Projection depth: A deeper shelf needs more height above the opening to stay safe.
- Non-combustible hearth: The floor in front of the fireplace must use fire-safe material such as tile or stone.
- Gas and electric units: These often have different rules. Always check the manual for your exact model.
Never guess on clearances. A licensed carpenter will confirm these numbers before the first cut. If you are weighing a do-it-yourself job against hiring help, see DIY carpentry vs. professional service for a clear comparison.
Tools and Materials You Will Need
Good tools make a big difference in the final result. A pro crew will bring all of these to the job.
- Tape measure and 4-foot level
- Stud finder and pencil
- Cordless drill and driver bits
- Miter saw and finish nailer
- Masonry bits and anchors (for brick or stone)
- Steel mounting cleat or heavy-duty brackets
- Construction adhesive and wood filler
- Caulk, sandpaper, and finish materials
- Safety glasses, gloves, and dust mask
Step-by-Step Fireplace Mantel Installation
The steps below show how a skilled carpenter handles a standard floating or shelf-style mantel. Full surrounds need extra steps for the legs and header.
- Confirm clearances. Read the fireplace manual and local code. Mark the minimum safe height for the mantel shelf above the firebox.
- Measure the wall. Find the center of the fireplace and mark it on the wall. Decide on the final mantel height and mark it with a level line.
- Locate studs or masonry. Use a stud finder to mark every stud along the mantel line. For brick or stone, plan where to drill anchor holes.
- Dry fit the mantel. Hold the mantel against the wall without fastening. Check for gaps, wall bumps, and level. Trim the back edge if the wall is uneven.
- Install the mounting cleat or brackets. Fasten the steel cleat to the studs with structural screws. Check that it is level and tight. It should not move at all.
- Slide on the mantel. Lift the mantel and slide it onto the cleat. Check that it sits flush against the wall.
- Secure the mantel. Add hidden screws or finish nails through the bottom or top, depending on the design. Use construction adhesive where the code allows.
- Fill and finish. Fill nail holes, caulk the seams, and sand lightly. Apply paint, stain, or sealer to match your room.
- Final inspection. Re-check level, clearances, and stability. Push down on the shelf to make sure it holds firm.
Common Fireplace Mantel Installation Mistakes
Even careful homeowners run into trouble. Watch out for these frequent problems:
- Ignoring wall studs: Drywall anchors cannot hold a heavy mantel. Always anchor into framing or masonry.
- Skipping the dry fit: Walls are rarely perfectly flat. A dry fit saves time and frustration.
- Wrong height: A mantel hung too low can break code. One hung too high can look awkward.
- Using the wrong finish near heat: Some stains and paints are not made for warm surfaces. Choose heat-rated products when needed.
- Forgetting the TV: If a TV will hang above the mantel, plan the depth and height so the screen sits at a comfortable level.
Design Tips for a Mantel That Fits Your Home
A great mantel matches the rest of the room. Carpenters and designers often follow a few simple rules.
Match the Trim
Pair your mantel with baseboards, crown, and door casings. Consistent profiles make the room feel finished. For more ideas, explore molding details and see how small profile choices change the look.
Build Around the Fireplace Wall
A mantel looks even better with the wall around it. Shiplap, panel molding, and built-in shelving all add depth. See 12 shiplap fireplace design ideas for fresh inspiration, or look at wall enhancements that frame the hearth beautifully.
Add Built-In Cabinetry
Flanking the fireplace with cabinets and shelves creates a true focal wall. Custom cabinets can hide storage, media equipment, and firewood. Learn more in custom built-in entertainment center: find the right carpenter.
Think About the Ceiling
A tall fireplace wall pairs well with beams or a coffered design. These details draw the eye upward and balance the room. Browse ceiling designs to see what works with your layout.
Custom vs. Prefab Mantels
Many buyers start by looking at ready-made mantels. These are easy to find, but they come in set sizes. They may not fit your firebox or your wall. A custom mantel is built to your exact measurements, wood species, and finish.
Custom work also solves tricky problems. Examples include uneven walls, tall ceilings, off-center fireplaces, and historic homes with unique trim. If you are still deciding, read custom vs. prefab fireplace mantle: which wins? for a full breakdown.
Who Benefits Most From Professional Installation?
Homeowners
If you want a mantel that looks like it was always part of your home, a pro can match your existing trim and paint. You also get peace of mind that the job meets safety rules.
Interior Designers
Designers need a carpenter who can turn a sketch into a real piece. Custom installers can adjust profiles, finishes, and depths to match a client’s vision without delays.
Real Estate Developers
A well-built mantel adds a luxury feel that buyers notice right away. Consistent, high-quality installs across multiple units help a development stand out in a crowded market.
What to Expect When You Hire a Carpenter
A good carpentry team follows a clear process. Here is what you can usually expect:
- Consultation: The carpenter visits your home, reviews the fireplace, and discusses style and goals.
- Measurements and design: They take exact measurements and sketch the mantel profile, depth, and height.
- Material selection: You choose the wood species, finish, and any extra trim details.
- Fabrication: The mantel is built in the shop or on site with precise cuts and joinery.
- Installation: The team mounts the mantel, seals the seams, and cleans up the work area.
- Final walkthrough: You inspect the work and confirm everything meets your expectations.
To learn more about how a local pro works with homeowners, see home carpentry services near me: what to expect. Before you hire anyone, it also helps to review the 7 mistakes to avoid when hiring carpenters.
Caring for Your Mantel After Installation
Once installed, a mantel needs only light care. Follow these tips to keep it looking sharp for years:
- Dust the surface with a soft, dry cloth every week
- Avoid placing hot items directly on the wood
- Use felt pads under heavy decor to prevent scratches
- Wipe up spills right away
- Touch up the finish when you notice wear
Wood can shift slightly with changes in humidity. Small seam gaps may appear over time. A quick bead of caulk and fresh paint will fix them.
Why Choose Bucheli Trim for Your Mantel Project
Bucheli Trim focuses on high-end custom carpentry across the Tampa Bay area. The team builds ceilings, wall details, built-in cabinetry, and fireplace surrounds with precise joinery and clean finishes. You can learn more on the about page or browse past custom projects. If you want to hear from past clients, read the testimonials or visit our Bucheli Trim location on Google to see reviews from Tampa Bay homeowners.
Conclusion
Fireplace mantel installation blends safety, strength, and style. The right mantel frames your hearth, lifts the whole room, and adds lasting value to your home. Careful measuring, strong mounting, and strict clearance checks make the difference between an average mantel and a stunning one.
If you are ready to add a mantel that fits your space perfectly, contact the Bucheli Trim team to start planning your custom fireplace project today.
FAQs
Q: How high should a fireplace mantel be installed above the firebox?
A: Most codes and manufacturers require a minimum gap between the top of the firebox opening and the underside of the mantel shelf. This distance grows as the shelf gets deeper. Always check your fireplace manual and local building code before you set the final height.
Q: Can I install a fireplace mantel myself?
A: Small, lightweight mantels can be a DIY project for experienced homeowners. Heavy beams, stone, or custom surrounds are best left to a professional carpenter. Proper anchoring and heat clearances are critical for safety.
Q: How do you attach a mantel to a brick fireplace?
A: Carpenters drill into the brick or mortar with a masonry bit and set strong anchors. A steel cleat or heavy-duty bracket is then bolted to the wall. The mantel slides over the cleat and is fastened from underneath or behind.
Q: How long does fireplace mantel installation take?
A: A simple shelf-style mantel can often be installed in a few hours. A full custom surround with trim and finishing may take one to several days. The timeline depends on the mantel design, wall condition, and finish work.
Q: What wood is best for a fireplace mantel?
A: Hardwoods such as oak, maple, and walnut are strong and hold up well near heat. Pine and poplar are good paint-grade options. Your carpenter can recommend a species based on your style, finish, and fireplace type.