Key Takeaways
-
Follow an 8-step installation process: measure carefully, choose the right profile, plan layout, cut with precision, dry fit before securing, attach with proper fasteners, fill and sand gaps, then prime and paint for flawless results.
-
In humid climates like Tampa Bay, use moisture-resistant materials such as PVC trim or properly sealed wood to prevent warping and gaps caused by humidity fluctuations throughout the year.
-
Professional trim installation minimizes material waste, ensures tight seams and clean lines, and provides long-term durability, making it worthwhile despite higher upfront costs compared to DIY attempts.
-
Quality trim work—including baseboards, crown molding, and door casings—directly influences buyer perception and home value, with developers seeing stronger sales when trim details are executed well.
-
Common mistakes like skipping measurements, ignoring uneven walls, using wrong nail sizes, and rushing the finish can ruin an entire project; hiring skilled carpenters prevents costly errors.
-
Prepare your home before installation by clearing furniture, confirming paint colors, removing old trim if needed, and discussing scheduling with your carpentry team to ensure efficient workflow.
Great trim installation can turn a plain room into something special. It adds character to walls, ceilings, and doorways. But getting it right takes skill, planning, and the right tools. Whether you are a homeowner dreaming of a fresh look, an interior designer planning a client’s space, or a real estate developer adding value to a property, understanding trim installation helps you make smart choices.
This guide breaks down the process into clear steps. You will learn what goes into quality trim work, what mistakes to avoid, and why hiring skilled carpenters matters. Bucheli Trim has spent years perfecting this craft across the Tampa Bay area, and we want to share what we know. By the end, you will understand exactly what makes trim installation stand out and last for decades.
What Is Trim Installation in Custom Carpentry
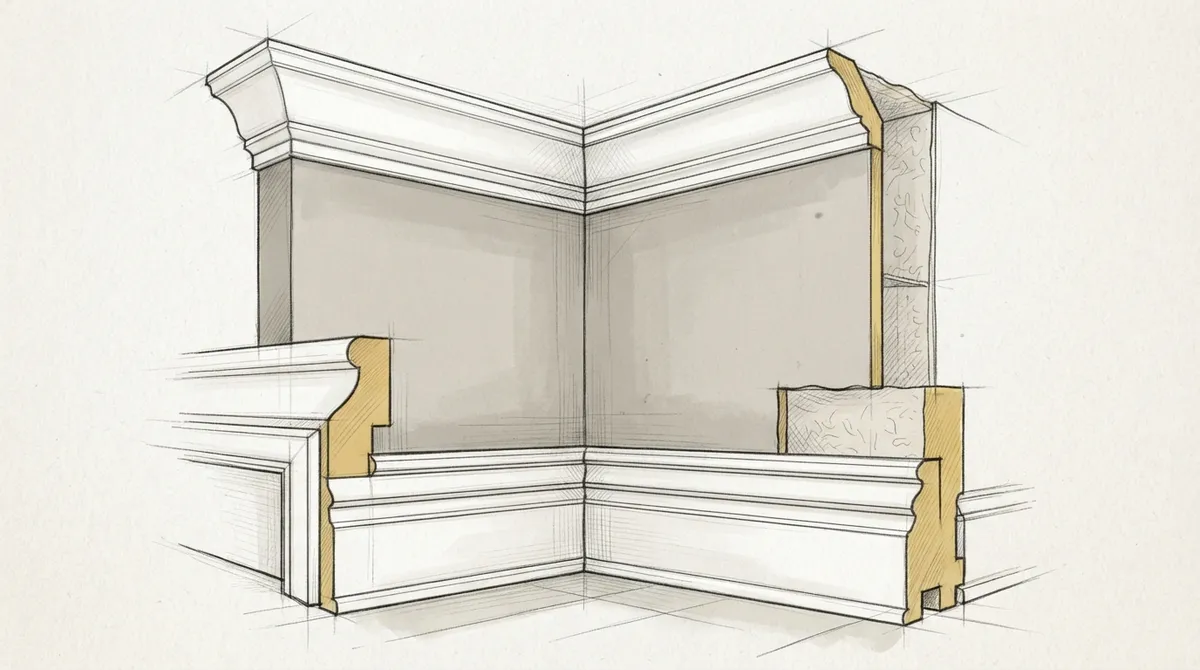
Trim installation is the process of adding decorative wood pieces to finish off a room. This includes baseboards, crown molding, door casings, and window trim. It covers the gaps between walls, floors, ceilings, and openings. Good trim also hides small imperfections in construction.
In custom carpentry, trim work goes far beyond basic function. It becomes a design feature. Thick crown molding can make ceilings feel grander. Detailed baseboards can anchor a room’s style. Layered window casings can add texture and depth. You can learn more about carpentry as a trade to understand how trim fits into the larger craft.
Why Trim Matters More Than You Think
Many homeowners overlook trim until it is missing or damaged. But trim does real work in a home. It protects walls from dings, covers structural gaps, and adds a finished look that raw drywall cannot match.
- Hides gaps between walls and floors or ceilings
- Protects wall corners and edges from daily wear
- Adds architectural style and visual interest
- Increases perceived home value for buyers
- Creates a cohesive look throughout connected rooms
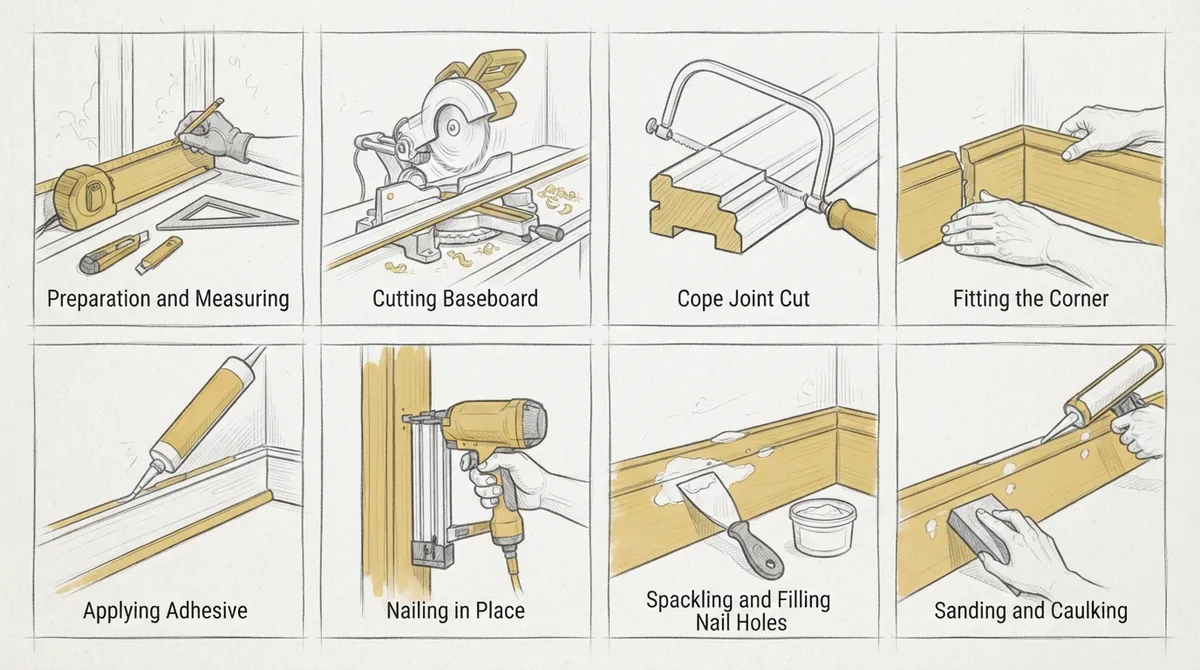
8 Steps for Flawless Trim Installation
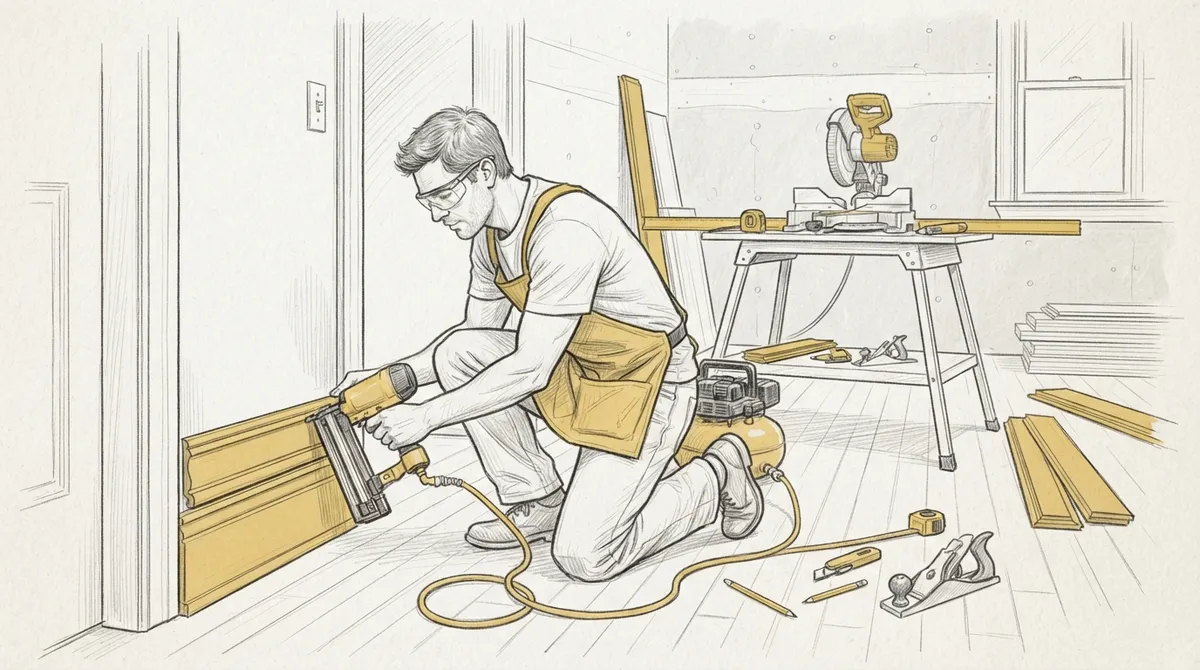
Every successful trim project follows a clear sequence. Skipping steps leads to gaps, crooked lines, and wasted material. Here is the process our team follows on every job.
- Measure the space carefully. Every wall, corner, and opening gets measured before any cutting begins. This step catches uneven walls early.
- Choose the right trim profile and material. Different rooms call for different styles, from simple baseboards to detailed crown molding designs.
- Plan the layout and joints. Corners, seams, and transitions get mapped out to avoid awkward cuts later.
- Cut each piece with precision. Miter and coped joints need sharp, accurate cuts for tight seams.
- Dry fit before securing anything. Pieces get held in place to check the fit before nails go in.
- Attach trim with proper fasteners. Nails or adhesive get placed to hold trim firmly without splitting the wood.
- Fill gaps and sand smooth. Nail holes and seams get filled, then sanded for a clean surface.
- Prime and paint or finish. A final coat protects the wood and completes the look.
These eight steps sound simple, but each one takes experience to execute well. A crooked cut or rushed fit can ruin an entire wall’s appearance.
Types of Trim Work Homeowners Request Most
Not all trim projects look the same. Homeowners and designers often request specific styles based on the room and overall design goal. Understanding these categories helps you plan your next project.
| Trim Type | Common Use | Design Impact |
|---|---|---|
| Baseboards | Floor-to-wall transition | Grounds the room, adds subtle style |
| Crown Molding | Ceiling-to-wall transition | Adds height and formal elegance |
| Door and Window Casing | Frames openings | Creates a finished, intentional look |
| Wainscoting and Panel Trim | Lower or full wall coverage | Adds texture and architectural interest |
| Chair Rail | Mid-wall protection and style | Divides wall visually, protects surface |
Each of these trim types can be customized further with paint colors, wood species, and profile depth. For a deeper look at wall styles, check out our guide on wainscoting and wall paneling options.
Common Mistakes That Ruin Trim Installation
Even experienced DIYers run into trouble with trim work. Small errors can create big problems that are hard to fix later. Here are the mistakes we see most often.
- Skipping accurate measurements before cutting
- Using the wrong nail size or spacing, causing loose trim
- Ignoring uneven walls or floors, leading to visible gaps
- Ignoring wood movement caused by humidity changes
- Choosing a trim profile that clashes with the room’s style
- Rushing the caulk and paint finish step
Florida’s humid climate adds another layer of difficulty. Wood trim can expand and contract with moisture changes throughout the year. This is one reason why professional installation matters so much in the Tampa Bay area. To avoid these pitfalls, read our article on baseboard installation mistakes before starting any project.
How Climate Affects Trim Materials
Tampa Bay’s warm, humid weather means wood trim needs proper acclimation before installation. Skipping this step often leads to warping or gaps within months. Skilled carpenters know how to store and prep materials to prevent this issue.
DIY vs Professional Trim Installation
Some homeowners consider tackling trim work themselves to save time. But this project requires more precision than most people expect. Below is a quick comparison to help you decide.
| Factor | DIY Installation | Professional Installation |
|---|---|---|
| Tools Required | Miter saw, nail gun, level, coping saw | Professional-grade equipment already on hand |
| Time Investment | Steep learning curve, slow progress | Efficient, experienced workflow |
| Finish Quality | Visible gaps or uneven joints common | Tight seams, clean lines, smooth finish |
| Material Waste | Higher due to cutting errors | Minimized through careful planning |
| Long-Term Durability | May loosen or warp over time | Built to last with proper technique |
If you are still weighing your options, our detailed comparison on DIY carpentry versus professional service breaks down the pros and cons further.
What Interior Designers Should Know About Trim Work
Interior designers often bring bold ideas to a project, but those ideas need a skilled carpenter to execute them correctly. Trim details can make or break a design concept. Communication between designer and carpenter matters just as much as the tools used.
- Share detailed drawings or reference photos early in the process
- Confirm wood species and paint compatibility before installation
- Discuss ceiling height and room proportions for scale accuracy
- Coordinate timing with painters and other trades on site
- Request samples of trim profiles before full installation begins
Working with an experienced team like Bucheli Trim helps designers translate their vision into reality without compromise. Explore our custom projects page to see examples of past collaborations with design professionals.
Why Real Estate Developers Invest in Quality Trim
Trim details often influence a buyer’s first impression of a home. Developers who invest in quality millwork see a real return in how properties show and sell. Clean, well-installed trim signals craftsmanship throughout the entire property.
- Improves perceived value during walkthroughs and showings
- Creates consistency across multiple units or model homes
- Differentiates luxury listings from standard builds
- Reduces callback issues from poor-quality installation
- Supports faster sales through stronger buyer impressions
For larger developments, working with one trusted carpentry team ensures consistent quality across every unit. Our molding details page shows the range of styles available for developments of any size.
Choosing the Right Materials for Trim Installation
Material choice affects both appearance and durability. Wood species, density, and finish type all play a role in how trim performs over time. Here are the most common options used in custom carpentry today.
- Solid wood: Best for high-end projects, takes stain and paint well
- MDF (medium-density fiberboard): Smooth finish, budget-friendly, paints well
- PVC trim: Moisture-resistant, ideal for humid climates or exterior use
- Poplar: Affordable hardwood option with a smooth grain for painting
In Florida’s climate, moisture resistance is a major factor. Many Tampa Bay homeowners choose PVC or properly sealed wood for areas prone to humidity swings, like bathrooms or exterior applications. Learn more about exterior options in our guide on exterior window trim installation.
How to Prepare Your Home Before Installation Day
Preparation makes the installation process faster and smoother. A little planning ahead saves time once the carpentry crew arrives.
- Clear furniture and decor away from walls and baseboards
- Remove existing trim if a full replacement is planned
- Confirm paint colors and finish choices in advance
- Ensure clear access paths for tools and materials
- Discuss any pets or scheduling needs with your carpentry team
Taking these steps ahead of time helps the project move quickly and reduces disruption to your daily routine. It also gives your carpenter room to focus on precision rather than logistics.
Finding a Trusted Trim Installation Team in Tampa Bay
Not every carpenter specializes in detailed trim work. Look for a team with a strong portfolio, clear communication, and attention to detail. Ask about their process, materials, and experience with similar projects.
Bucheli Trim has built a reputation across the Tampa Bay area for precise, high-end trim installation. Our team handles everything from baseboards to custom ceiling designs and wall enhancements. You can follow our work on Facebook to see recent projects, or visit us on Google — Bucheli Trim to read what our clients have to say about their experience.
If you want to add long-lasting style to your home, our team also handles custom cabinetry and finishing touches like epoxy floor coatings for garages and living spaces.
Final Thoughts on Trim Installation
Trim installation may seem like a small detail, but it shapes how a home feels and functions. From baseboards to crown molding, every piece plays a role in the overall design. Skilled installation ensures these details last for years without gaps, warping, or loose joints.
Whether you are updating a single room or planning trim for an entire development, working with an experienced carpentry team makes all the difference. Ready to upgrade your space with expert craftsmanship? Reach out to our team today to discuss your next trim installation project.
FAQs
Q: What is trim installation in custom carpentry?
A: Trim installation is the process of adding finishing wood pieces like baseboards, crown molding, and door casings to a home. It covers gaps between surfaces and adds style to a room. In custom carpentry, trim also becomes a design feature that elevates the overall look.
Q: How long does professional trim installation take?
A: Timing depends on the size of the project and the complexity of the trim style chosen. A single room with baseboards might take a day, while a whole-home crown molding project can take several days. Working with an experienced carpentry team keeps the timeline efficient and accurate.
Q: Why does trim installation matter for home value?
A: Quality trim work signals craftsmanship and attention to detail throughout a home. It creates a polished, finished look that buyers notice immediately. Real estate developers often see stronger buyer impressions and faster sales when trim details are done well.
Q: Can trim installation be done as a DIY project?
A: While it is possible to attempt trim installation yourself, achieving tight seams and clean lines takes practice and the right tools. Common DIY mistakes include uneven cuts and visible gaps. Many homeowners choose professional installation for a smoother, longer-lasting result.
Q: What materials are best for trim in humid climates like Tampa Bay?
A: In humid areas, moisture-resistant materials like PVC trim or properly sealed wood perform best. These options resist warping and gaps caused by humidity swings. A local carpentry team can recommend the right material based on room location and climate exposure.