Key Takeaways
-
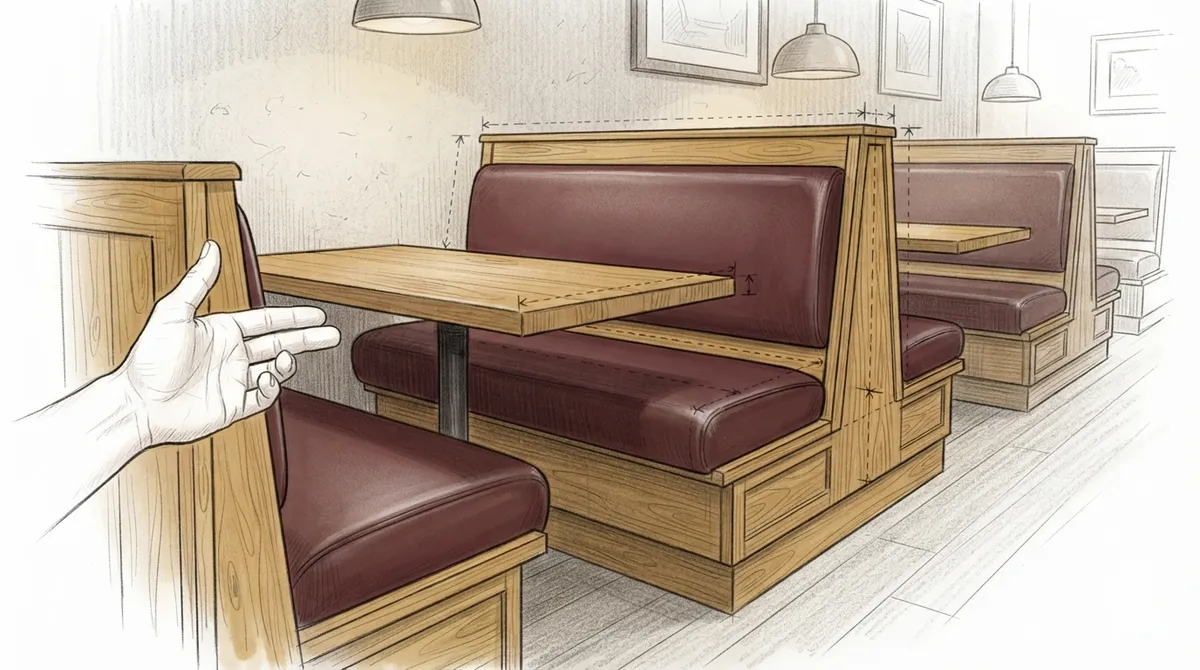
Custom booth dimensions critically matter: seat height 17-19 inches, depth 18-22 inches, backrest height 36-60 inches, and 24-26 inches width per guest prevent discomfort and ensure guests stay longer.
-
Choose hardwood frames (oak, maple, ash) with commercial-grade vinyl or performance fabric upholstery to withstand hundreds of weekly guest uses, spills, and daily cleaning without deteriorating.
-
Measure your entire dining room including walls, columns, vents, outlets, and windows before designing; place booths along walls first to maximize floor space and maintain accessible 10-12 inch gaps between tables and seats.
-
Design high-backed booths (48-60 inches) to absorb noise and provide privacy in loud restaurants, while lower backs (36-42 inches) maintain open sightlines and keep the room feeling spacious.
-
Incorporate removable cushions, raised bases, and smooth seams into booth design to simplify nightly cleaning and enable quick repairs without requiring full reupholstery.
-
Plan electrical infrastructure during initial design phase to add built-in outlets or USB charging ports along booth bases, keeping modern guest expectations met while maintaining a clean aesthetic.
Great restaurants are built on great comfort. Guests may come for the food, but they stay and return because the space feels right. Restaurant booth seating plays a huge role in that feeling. A well-built booth invites people to settle in, relax, and enjoy the meal.
For restaurant owners, interior designers, and developers, booths are more than furniture. They shape traffic flow, set the mood, and affect how many guests you can serve. Custom carpentry gives you full control over size, shape, materials, and finish. Nothing is forced to fit a room it was not made for.
This guide walks you through the planning process step by step. You will learn how to measure your space, pick the right materials, and design booths that hold up to daily use. Whether you are opening a new venue in Tampa Bay or refreshing an existing dining room, these steps will help you get it right.
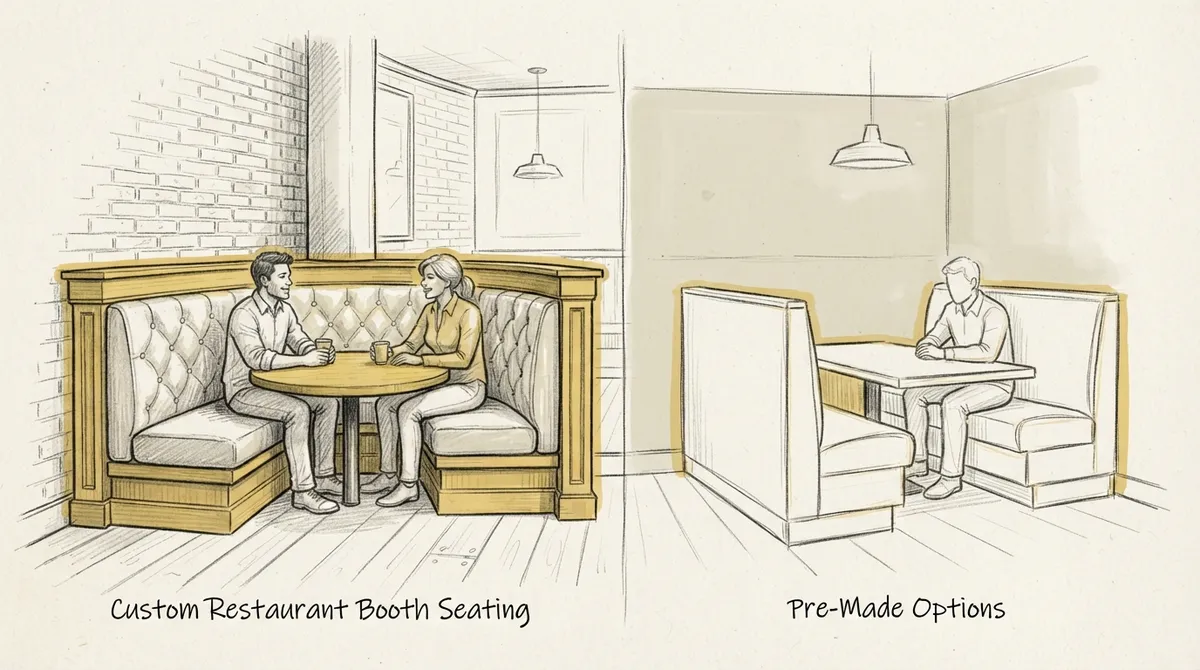
Why Custom Restaurant Booth Seating Beats Pre-Made Options
Pre-made booths come in set sizes. Dining rooms rarely match those sizes. Walls bend, columns appear, and windows sit in odd places. A custom booth is built to fit your exact room.
Custom carpentry also lets you match your brand. You choose the wood species, the stain, the shape of the backrest, and the stitching on the upholstery. The result looks like part of the building, not an afterthought. This is the same idea behind built-in cabinetry solutions in a home. Everything is made to belong.
Here are the main advantages of going custom:
- Exact fit: Booths follow your walls, corners, and curves with no gaps.
- Stronger build: Solid frames and quality joinery handle heavy daily use.
- Unique look: Your dining room stands apart from every chain restaurant.
- Better use of space: You gain seats in awkward corners and along long walls.
- Easy repairs: Panels and cushions can be made removable for quick fixes.
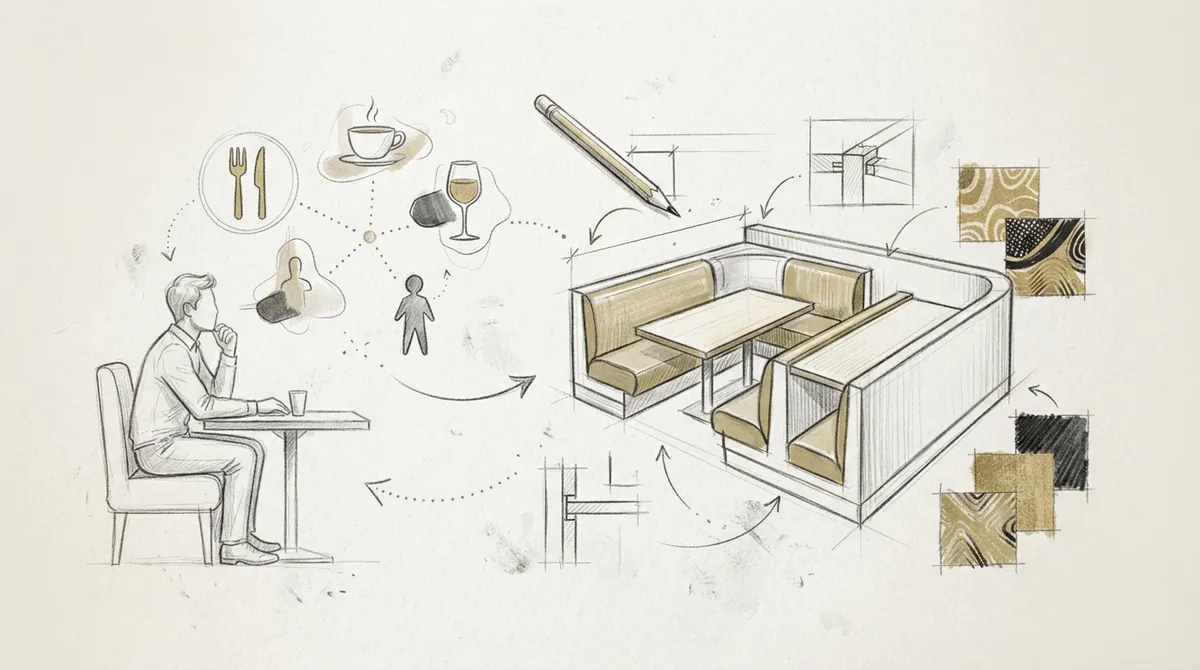
Step 1: Define Your Restaurant Concept and Guest Needs
Start with the story of your restaurant. A cozy bistro needs a different booth than a fast-casual spot or a high-end steakhouse. The booth should match how guests use the room.
Ask yourself a few simple questions. How long will guests stay? Will most parties be couples, families, or larger groups? Will people linger over wine or turn tables quickly? The answers guide every design choice that follows.
Think About Your Guest Types
Families need wider seats and easy-to-clean surfaces. Date-night diners enjoy deeper, softer seating with high backs for privacy. Business lunch crowds want comfort without being too relaxed. Design for the guests you serve most often.
Match the Booth to Your Brand
Warm wood tones feel welcoming and classic. Dark leather feels bold and upscale. Light fabrics and clean lines feel fresh and modern. Pick a style that supports your brand message from the first glance.
Step 2: Measure Your Space and Plan the Layout
Good planning prevents costly mistakes. Measure your dining room carefully before you draw anything. Note every wall, column, vent, outlet, and window.
Follow these steps to build a smart layout:
- Measure the full room: Record length, width, and ceiling height. Mark all fixed items.
- Map your walkways: Keep main aisles wide enough for staff and guests to pass with ease.
- Place booths along walls first: Walls give booths natural backing and save floor space.
- Add corner and curved booths: These make use of tight spots and add visual interest.
- Check local codes: Confirm accessibility and egress rules before you finalize the plan.
- Create a scale drawing: Share it with your carpenter so details are clear.
Always keep accessibility in mind. Mix booths with open tables so guests with mobility needs have easy options. Your carpenter can help you confirm that clearances meet current rules.
Step 3: Choose the Right Booth Dimensions
Comfort comes down to a few key measurements. Small changes in height or depth can make a booth feel great or awkward. The table below shows common starting points used in restaurant design.
| Booth Element | Typical Range | Why It Matters |
|---|---|---|
| Seat height | 17 to 19 inches | Keeps guests comfortable and supported |
| Seat depth | 18 to 22 inches | Prevents sliding forward or sitting too stiff |
| Backrest height (low) | 36 to 42 inches | Open feel, easy sight lines |
| Backrest height (high) | 48 to 60 inches | More privacy and noise control |
| Table height | 29 to 30 inches | Standard dining comfort |
| Table-to-seat gap | 10 to 12 inches | Room to move without feeling cramped |
| Width per guest | 24 to 26 inches | Enough elbow room at the table |
Treat these numbers as a starting point. Your carpenter can adjust them based on your concept and guest mix. A lounge-style booth may use deeper, lower seating, while a busy diner may use firmer, more upright seats.
Step 4: Pick Durable Materials
Restaurant seating takes a beating. Guests slide in and out hundreds of times a week. Spills happen. Cleaning products are used daily. Your materials must handle all of it.
Frame and Structure
Hardwoods such as oak, maple, and ash make strong frames. They hold screws well and resist wear. Plywood with a quality veneer works well for hidden structure and panels. Strong joinery matters more than anything else. Solid frames stay tight for years, while weak ones loosen and creak.
Upholstery Choices
Upholstery is where guests touch your design. Commercial-grade vinyl and leather are popular because they wipe clean fast. Performance fabrics offer softness with stain resistance. Always ask for materials rated for commercial use.
- Commercial vinyl: Easy to clean and very durable.
- Genuine leather: Rich look that improves with age.
- Performance fabric: Soft feel with stain and wear resistance.
- Foam cushioning: High-density foam keeps its shape under heavy use.
Finishes and Trim
The finish protects the wood and sets the tone. Stains bring out grain, while paint gives a bolder look. Add trim details to make booths feel built into the room. Decorative molding details and clean trim and molding help booths blend with walls and ceilings.
Step 5: Design for Comfort and Cleaning
A beautiful booth that is hard to clean will cost you time every night. A booth that is hard to sit in will cost you repeat guests. Aim for both comfort and easy upkeep.
Consider these design features:
- Slight backrest angle: A gentle tilt makes seating more relaxing.
- Tufting with care: Deep tufting looks great but traps crumbs. Use it where it fits your menu and style.
- Raised base: A toe kick or lifted base makes floor cleaning simple.
- Removable cushions: Panels that lift out make deep cleaning and repairs easy.
- Smooth seams: Fewer seams mean fewer places for dirt to hide.
Think about the floor beneath the booth as well. Durable surfaces such as flooring and epoxy floors handle spills and constant traffic. This pairs well with epoxy coatings in busy dining areas and kitchens.
Step 6: Plan for Sound, Lighting, and Power
Booths shape how a room sounds and feels. High backs absorb noise and create a sense of privacy. Soft upholstery helps cut echo in busy rooms. If your dining room is loud, taller booth backs can make a real difference.
Lighting also matters. Pendant lights above each booth create a warm glow and define each space. Wall sconces add depth. Plan wiring early so your carpenter can build in clean channels and avoid messy cords later.
Modern guests expect to charge their phones. Built-in outlets or USB ports along the booth base are a thoughtful touch. Planning them during the design phase keeps wires hidden and the look clean.
Step 7: Blend Booths With Your Walls and Ceiling
The best booths look like part of the room. Wall treatments behind the booths frame the seating and protect walls from scuffs. Wood panels, wainscoting, and padded wall sections all work well. Explore wall enhancements that tie the booth and wall together as one design.
Overhead details complete the picture. A soffit or beam above a booth row creates a defined zone. You can see how ceiling features shape a space through these ceiling designs. Matching wood tones across booths, walls, and ceilings gives the room a polished, high-end feel. Learn the basics of the craft behind it all through this overview to learn more about carpentry.
Step 8: Work With a Skilled Custom Carpenter
The right carpenter turns plans into seating that lasts. Look for a team with proven experience in built-ins and commercial-quality joinery. Ask to see past projects. Check that they understand load, wear, and safety needs for public spaces.
A strong carpenter will walk the space with you, take exact measurements, and build a mock-up if needed. They will also coordinate with your upholsterer, electrician, and designer. If you want to know what sets great builders apart, review these signs of true craftsmanship before you hire.
Bucheli Trim specializes in high-end custom carpentry across the Tampa Bay area, from built-in cabinetry to detailed wall and ceiling work. The same precision that goes into a custom home feature applies to a restaurant dining room. You can see the range of work in their custom projects and see what local clients say when you read Bucheli Trim reviews on Google.
Questions to Ask Before You Hire
- Have you built commercial or hospitality seating before?
- What wood species and joinery methods do you use?
- Can you work with my designer and upholsterer?
- How do you handle site measurements and templates?
- What is your timeline from design to installation?
Avoid common hiring errors by reading about mistakes to avoid when hiring carpenters. A little research up front protects your budget and your opening date.
Step 9: Review the Build and Installation Process
Knowing the typical workflow helps you stay organized. Most custom booth projects follow a similar path.
- Consultation: You share your concept, goals, and floor plan.
- Site measurement: The carpenter measures walls, floors, and obstacles.
- Design and approval: Drawings show size, shape, and finish. You sign off before building starts.
- Shop fabrication: Frames and panels are built in a controlled shop for precision.
- Upholstery: Cushions and backs are covered and fitted.
- Installation: Booths are placed, leveled, and secured to the floor or wall.
- Final walkthrough: You inspect the work and request any adjustments.
Plan the installation around your other trades. Painting, flooring, and lighting should be finished or well coordinated so nothing gets damaged during the install. A smooth schedule keeps your opening on track.
Common Booth Seating Mistakes to Avoid
Many restaurants repeat the same errors. Learn from them and save yourself stress later.
- Skipping the mock-up: A quick sample seat shows comfort problems before full production.
- Ignoring walkway width: Tight aisles slow service and annoy guests.
- Choosing style over durability: Pretty materials that wear fast cost more in the long run.
- Forgetting maintenance access: Hidden panels and removable cushions make repairs simple.
- Using residential-grade fabric: It will fail quickly under commercial use.
A little foresight goes a long way. Thoughtful choices at the start mean fewer repairs and a longer life for your seating.
Booth Styles to Consider for Your Dining Room
Different booth shapes suit different rooms. Here is a quick look at popular options.
| Booth Style | Best For | Key Benefit |
|---|---|---|
| Straight wall booth | Long walls and window lines | Efficient seating with a clean look |
| Corner booth | Tight corners and larger parties | Cozy feel and more seats per footprint |
| Curved or half-round booth | Central or feature areas | Soft shape and strong visual appeal |
| Banquette | Long, continuous wall runs | Flexible seating with movable tables |
| Freestanding double booth | Open floor plans | Defines zones without extra walls |
Many successful restaurants mix two or three styles. Variety keeps the room interesting and gives guests choices for how they like to sit.
Take the Next Step Toward Better Dining Spaces
Custom restaurant booth seating is an investment in comfort, style, and guest loyalty. When you plan carefully, choose strong materials, and work with a skilled carpenter, your booths will look great and last for years. Start with your concept, measure your space, and build a clear plan.
If you are ready to bring your dining room to life, contact the Bucheli Trim team to talk through your vision and see how custom carpentry can shape it. A great booth starts with a great conversation.
FAQs
Q: What is the best material for restaurant booth seating?
A: Hardwood frames, such as oak or maple, offer the best strength and lifespan. Pair them with commercial-grade vinyl, leather, or performance fabric for upholstery that resists spills, stains, and daily wear.
Q: How much space do I need between restaurant booths?
A: Main aisles should be wide enough for staff and guests to pass comfortably, and walkways must meet local accessibility and egress codes. A custom carpenter can help you confirm exact clearances for your floor plan.
Q: Why choose custom booths instead of ready-made ones?
A: Custom booths are built to fit your exact room, including odd corners, curves, and columns. They also let you control materials, finishes, and comfort details so the seating matches your brand and holds up to heavy use.
Q: What is the standard height for a restaurant booth backrest?
A: Low backs usually run about 36 to 42 inches, while high backs often range from 48 to 60 inches. Taller backs add privacy and help reduce noise, while lower backs keep the room feeling open.
Q: How long does it take to build custom restaurant booths?
A: Timelines depend on the size of the project, material choices, and upholstery lead times. Most projects move through consultation, measuring, design approval, shop fabrication, upholstery, and installation, so it is best to start planning well before your opening date.