Key Takeaways
-
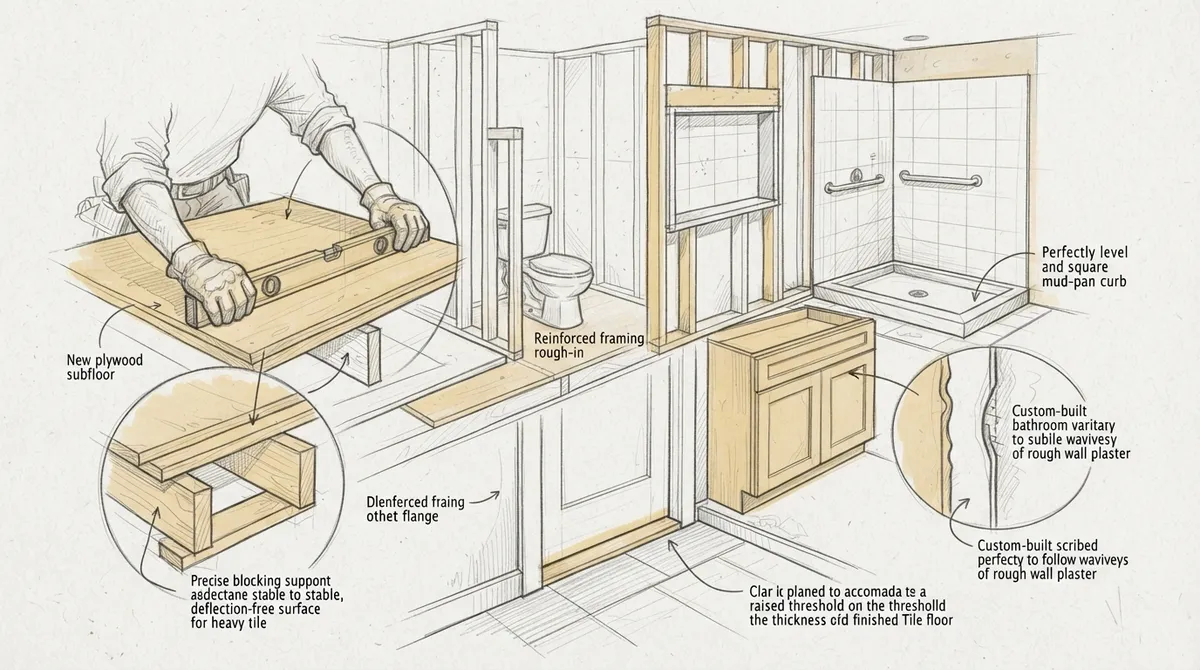
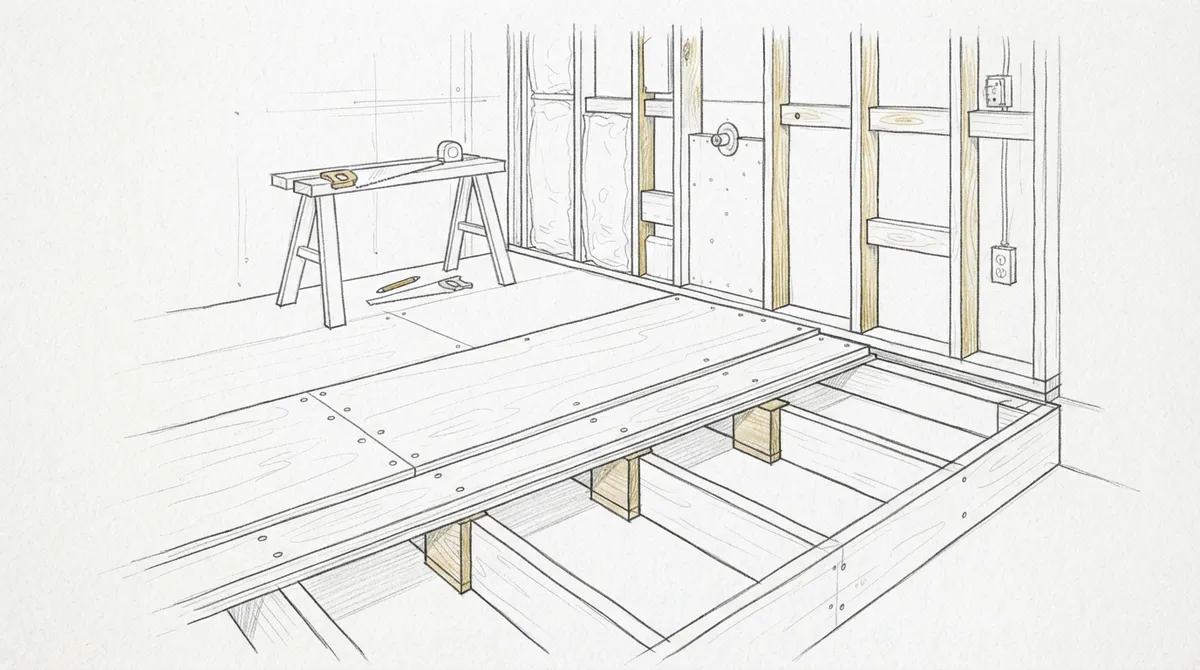
Solid subfloor and framing prep come first: tile is rigid, so any flex or uneven joists will crack tile and fail grout. Have a carpenter add blocking, stiffen the underlayment, and level high and low spots before tiling.
-
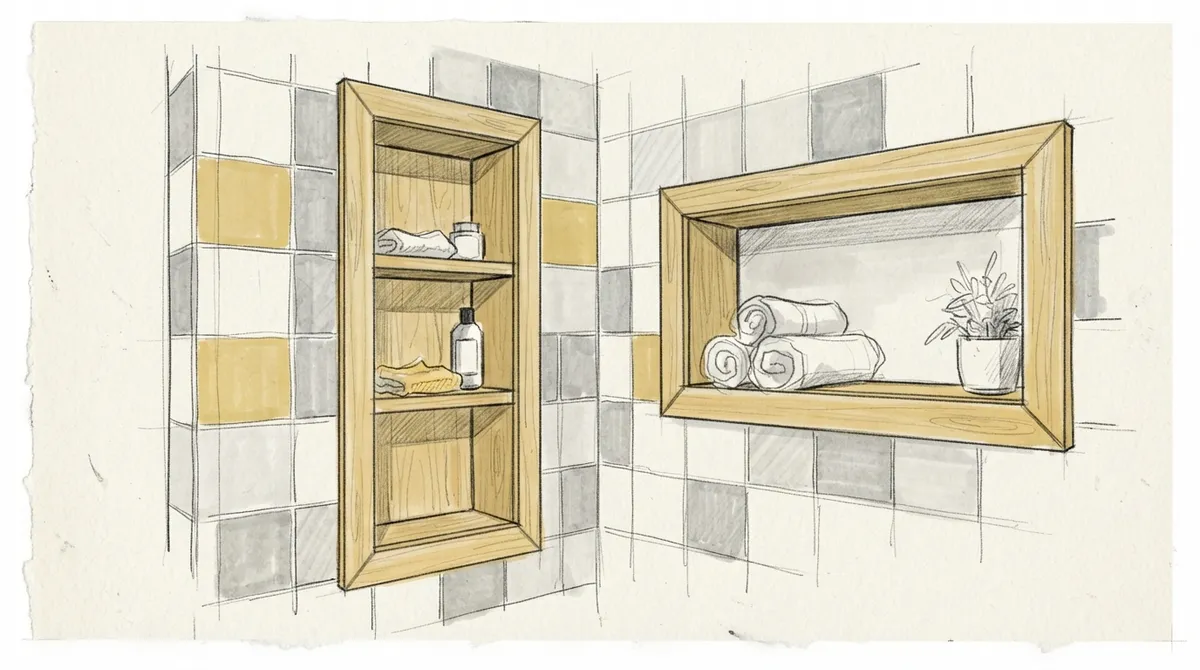
Plan shower niches around your tile size before framing them. Set the niche height to align with grout lines, slope the base so water drains, and keep it away from the main spray to avoid messy cuts.
-
Coordinate cabinet and tile plans together, since backsplash edges and vanity installs are where gaps show. Scribing cabinets to walls and floors and matching tile layouts prevents ugly seams.
-
Check door clearances and threshold heights when new tile goes in, because tile is often thicker than the old floor. A carpenter can plane door bottoms or cut thresholds so doors swing freely.
Tile gets all the attention in a finished room. But the wood work around it decides whether the room looks polished or rushed. Clean edges, level surfaces, and strong framing all come from carpentry. Without them, even the most beautiful tile can look off.
That is why tile work and custom carpentry go hand in hand. Tile needs a flat, solid base. It needs trim that frames it cleanly. It needs cabinets, niches, and shelves that line up with every grout line.
This guide covers seven areas where carpentry shapes the final look of tile work. It is written for homeowners planning a remodel, interior designers who want precise results for clients, and developers who need finishes that stand out. You will learn what to plan, what to ask for, and what to avoid. Let’s start with the foundation.
1. Solid Subfloor and Framing Prep
Every good tile job starts below the surface. Tile is hard but not flexible. If the floor or wall flexes, tile cracks and grout fails.
A skilled carpenter checks the framing before any tile goes down. They look for soft spots, uneven joists, and weak sheathing. Then they fix these problems first.
Here is what a carpenter typically handles in this stage:
- Adding blocking between joists to reduce movement
- Installing a stiff underlayment layer
- Leveling high and low spots in the subfloor
- Reinforcing walls where heavy stone or large tile will hang
This prep work is hidden once the room is done. Yet it is the main reason tile lasts for decades. In humid areas like Tampa Bay, strong framing and moisture-aware materials matter even more.
2. Custom Tile Niches and Recessed Shelves
Shower niches are one of the most loved features in modern bathrooms. They hold soap and shampoo without cluttering the floor. But a niche is really a small carpentry project.
The opening must be framed square and sized to match your tile layout. If the niche is even a half inch off, the tile cuts look messy. A good carpenter plans the niche around the tile size so that full pieces fit with minimal cutting.
Planning Tips for Niches
- Choose your tile size before framing the niche.
- Set the niche height to line up with grout lines.
- Frame it slightly sloped so water drains out.
- Place it away from the main water spray when possible.
The same idea applies to recessed shelves in living rooms or fireplaces. Clean framing makes tile sit flush and look intentional.
3. Trim and Molding That Frames Tile
Tile needs a border to look finished. Without trim, raw tile edges can look sharp and unfinished. Wood trim softens those edges and ties tile to the rest of the room.
Baseboards, window casings, and door trim all meet tile at some point. A carpenter cuts each piece to sit tight against the tile surface. The result is a smooth, seamless transition. If you want to learn how trim shapes a room, see this guide on trim and molding that transforms your space.
Common trim types used around tile include:
- Baseboards that sit above a tiled floor
- Window casings around tiled sills or backsplashes
- Door trim at tiled entryways
- Chair rail or cap molding along tiled wainscoting
For deeper detail on baseboards, read Baseboards 101: Styles, Materials & Design Tips for 2026.
4. Built-In Cabinetry Around Tile Surfaces
Tile and cabinets meet in kitchens, bathrooms, laundry rooms, and mudrooms. Where they meet is where mistakes show up most. A cabinet that is not scribed to the wall or floor leaves ugly gaps.
Custom carpentry solves this. Cabinets are built or adjusted to fit your exact tile layout. This matters most for backsplashes, where tile must end cleanly under upper cabinets and behind countertops.
Timing is also key. The best results come when cabinet and tile plans are made together. Here is how the two trades compare on common tasks:
| Task | Carpentry Role | Tile Role |
|---|---|---|
| Backsplash edge | Sets cabinet height and trim | Cuts tile to meet cabinet line |
| Vanity install | Builds and levels the vanity | Tiles floor and wall around it |
| Floor transitions | Cuts thresholds and trim | Sets tile to threshold height |
| Shower surround | Frames walls and niches | Sets tile and grout |
To see how cabinetry can reshape a space, explore 7 built-in cabinetry solutions that transform your home.
5. Custom Mantels and Fireplace Surrounds
Tile on a fireplace adds color, texture, and a strong focal point. But the wood around it matters just as much. A custom mantel frames the tile and gives the whole wall a finished, high-end look.
Carpenters build the surround so tile can be applied to a flat, stable surface. They also leave proper clearances from the firebox, which keeps the design safe and up to code.
A few design ideas to consider:
- A thick wood mantel over a simple tile field
- Floor-to-ceiling tile with a slim wood cap
- Built-in shelves on both sides of a tiled hearth
- A shiplap or paneled upper wall above tile
If you are weighing options, see how to find and choose custom mantels near you for helpful guidance.
6. Wall Paneling and Wainscoting Paired With Tile
Mixing tile with wood paneling is a rising trend in bathrooms, entryways, and powder rooms. Tile covers the wet or high-wear zone. Wainscoting or paneling covers the rest of the wall.
The mix adds depth and warmth. It also lets you use bold tile in small doses while keeping the room calm and balanced.
Where This Pairing Works Best
- Powder rooms: Tile behind the sink, paneling on the other walls.
- Mudrooms: Tile floors with wainscoting that resists scuffs.
- Bathrooms: Tile in the shower zone, beadboard elsewhere.
- Kitchens: Tile backsplash with paneled walls near the dining area.
The carpenter sets the paneling height to line up with tile edges. This keeps the horizontal lines of the room clean. Learn more in Wainscoting: A Complete Guide to Wall Paneling.
7. Thresholds, Transitions, and Door Fit
The spot where tile meets another floor is easy to overlook. It is also where many projects go wrong. If the heights do not match, you get a tripping edge. If the gap is wide, dirt collects.
A carpenter handles these details with care. They cut wood thresholds to match tile height. They also trim door bottoms so doors swing freely over new tile, which is often thicker than the old floor.
This is especially common when upgrading to new tile floors. Doors that once cleared the floor may now scrape. A pro can plane or replace them. For ideas on door upgrades, check out custom doors vs. standard doors.
Quick Planning Checklist for Tile and Carpentry Projects
Good planning saves time and avoids rework. Use this simple list before starting:
- Pick your tile size and pattern first
- Share the tile plan with your carpenter
- Decide where trim, cabinets, and niches will go
- Check subfloor strength and moisture risk
- Confirm door clearances and floor heights
- Schedule carpentry and tile in the right order
Interior designers can speed this up by sharing detailed layouts early. Developers can lock in a consistent standard across several units. Homeowners benefit most by asking questions before work begins.
Why Tile Work Needs a Skilled Carpenter
Tile is only as good as what supports and frames it. Even small mistakes in level or square get magnified once tile goes down. A trained carpenter spots those issues early and fixes them.
Skilled carpentry also helps with the look. Clean miters, tight joints, and smooth transitions give a space a high-end feel. This is the kind of detail that buyers and guests notice, even if they cannot say why.
If you want to find the right pro, start with where to find a skilled carpenter near you. You can also read 13 signs of true craftsmanship in custom carpentry to know what quality looks like.
For general background on the trade, you can learn more about carpentry. If you are comparing floor finishes, epoxy is another option often used in garages and utility spaces.
Bucheli Trim serves the Tampa Bay area with high-end custom carpentry, from ceilings and walls to built-ins and finish work. Want to hear what past clients say? See what our Bucheli Trim customers say on Google. You can also follow our latest projects on Facebook.
Conclusion
Tile work looks best when carpentry and tile are planned as one project. Strong framing, clean trim, fitted cabinets, and smooth transitions all shape the final result. Skipping these steps often leads to cracks, gaps, and a room that feels unfinished.
Whether you are updating a bathroom, building a fireplace feature, or finishing a new development, bring your carpenter in early. The right planning turns good tile into a lasting, high-end finish.
Ready to start your next project? Contact Bucheli Trim to talk through your ideas and get expert carpentry that makes your tile work shine.
FAQs
Q: What does carpentry have to do with tile work?
A: Carpentry creates the base and frame that tile depends on. Carpenters build level subfloors, shower niches, trim, and cabinets that tile must fit around. Without precise carpentry, tile can crack or look uneven.
Q: Should I hire a carpenter before or after the tile installer?
A: It depends on the task. Framing, niches, and subfloor prep come first, before any tile is set. Finish trim and baseboards usually go in after the tile is complete.
Q: Can wood trim be used next to tile in wet areas?
A: Yes, when the right materials and finishes are used. Moisture-resistant wood, proper sealing, and good caulking help trim hold up near showers and sinks. A skilled carpenter will pick materials based on the room’s humidity.
Q: Why do doors sometimes scrape after new tile is installed?
A: Tile is often thicker than the old floor, which raises the surface height. Doors that once cleared the floor may now drag. A carpenter can trim the door bottom or replace the door to restore a smooth swing.